Skip to product information
1 of 10

Verti.Go Grigio Ombra – Marble Backsplash Planks

Verti.Go Grigio Ombra – Marble Backsplash Planks

A continuous marble slab look - made achievable without traditional tile installation.

Slab-look panels
Interlocking planks
Mortar-free installation
Regular price $49.89 CAD / section
Regular price Sale price $49.89 CAD / section
Sale Sold out
Free shipping.
Height
Section

✓ Fast shipping across Canada

✓ Support available before purchase

Quick overview

  • Made from real materials (marble, glass or metal)
  • Peel & stick installation (no mortar)
  • Permanent installation

Scroll for details.

Product Description
  • Decorative wall planks inspired by the look of continuous marble slabs.
  • Large-format, interlocking planks for precise alignment.
  • Sequenced A–E system recreates natural marble veining across the wall.
  • No mortar and no traditional grout required.
DYI-friendly panel system
  • Estimated time: 2-3 hours for a standard backsplash.
  • No mortar or curing time.
  • Straightforward alignment and sequencing.
  • Cuts can be made with the Verti•Go safety knife or standard cutting tools.

Note: Simpler than ceramic tile.

For full instructions, tools list, and grout details (if applicable), please refer to our complete installation guide below.

Care & maintenance

Verti•Go can be cleaned with a soft cloth and mild soap when needed, requires no sealing, and should not be cleaned with abrasive products.

Key FAQs

Is Verti•Go made of real marble?
No, Verti•Go is made of a high-quality decorative composite designed to replicate the look of marble slabs with consistent results and easier installation.

Do I need specialized tile tools to install Verti•Go?
No, Verti•Go panels are easy to cut and can be trimmed using a variety of common tools, including a utility knife, a hacksaw, a vinyl plank cutter, or any standard power saw.

Do the sections really need to follow the A–E sequence?
Yes, following the A–E sequence is essential to maintain the continuous marble flow across the wall.

View full details

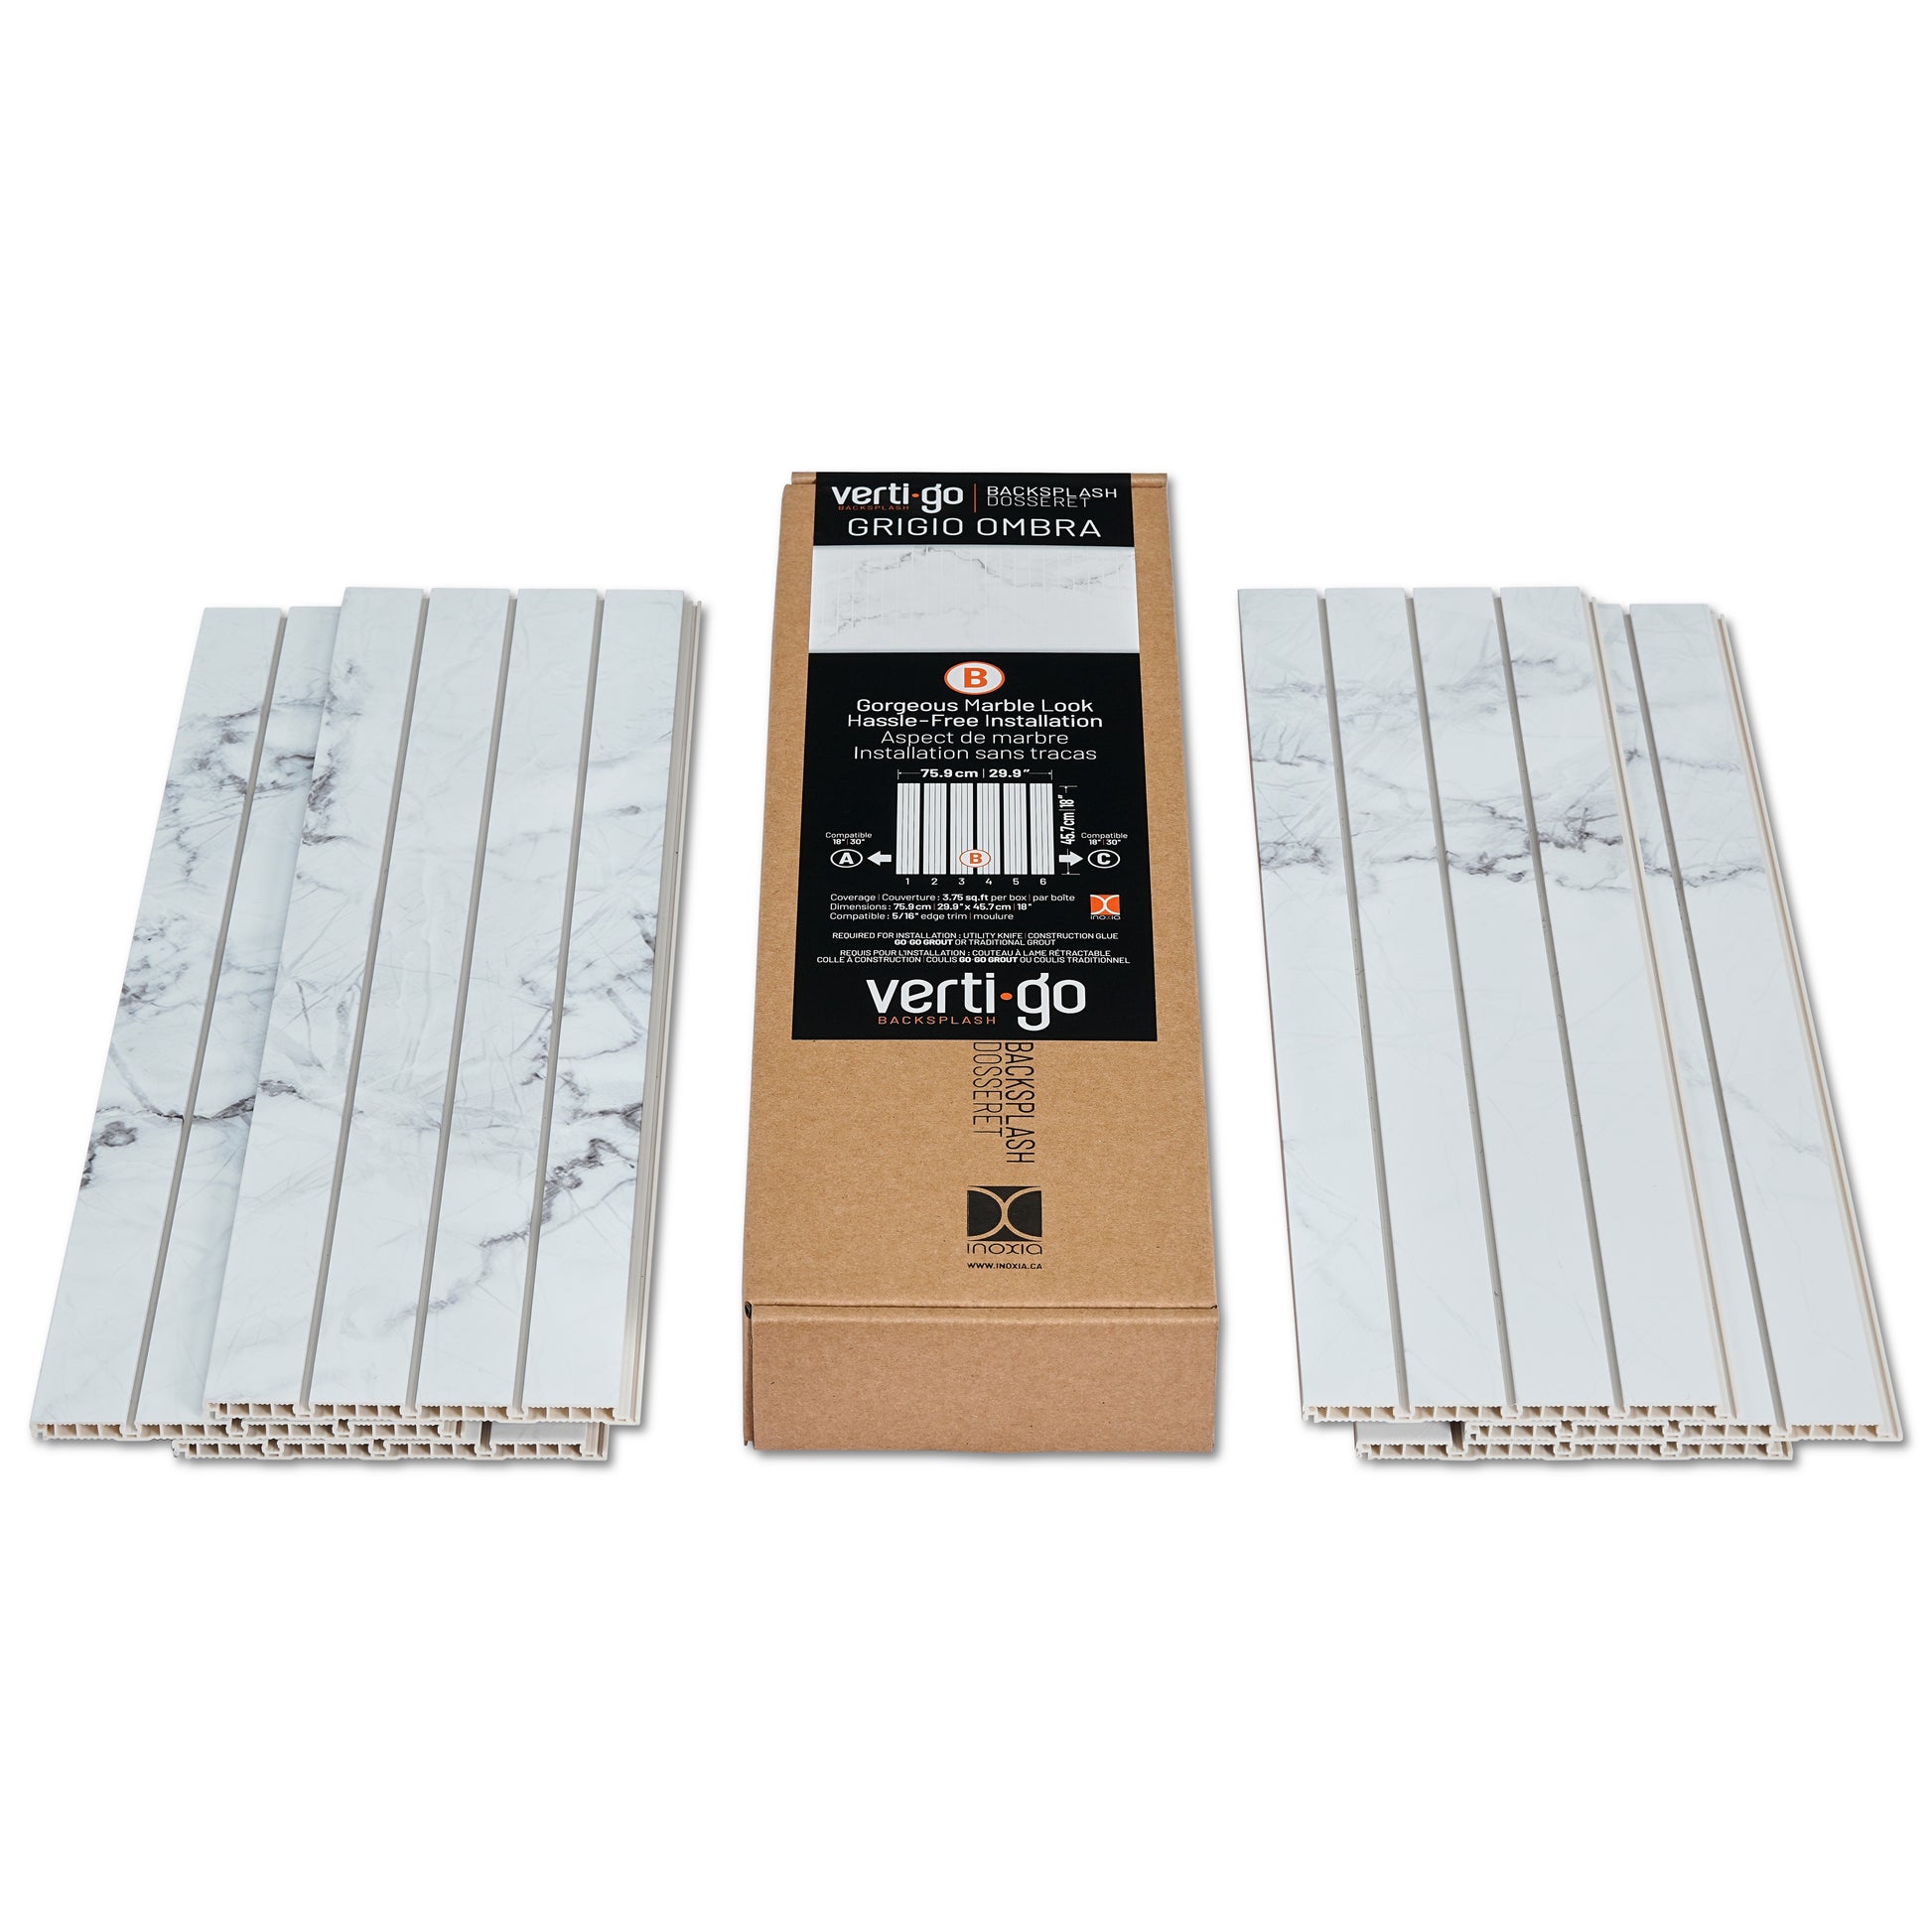
Who is Verti•Go for?

Verti•Go is designed for homeowners and renovators who want a high-end, architectural wall finish without the complexity of traditional tile installation.

This system is ideal if you want a refined, continuous marble look, prefer a clean and predictable installation process, and are completing your project without hiring a contractor.

Verti•Go is also well suited for projects where precision, alignment, and visual continuity are important, such as kitchens, feature walls, or focal areas.

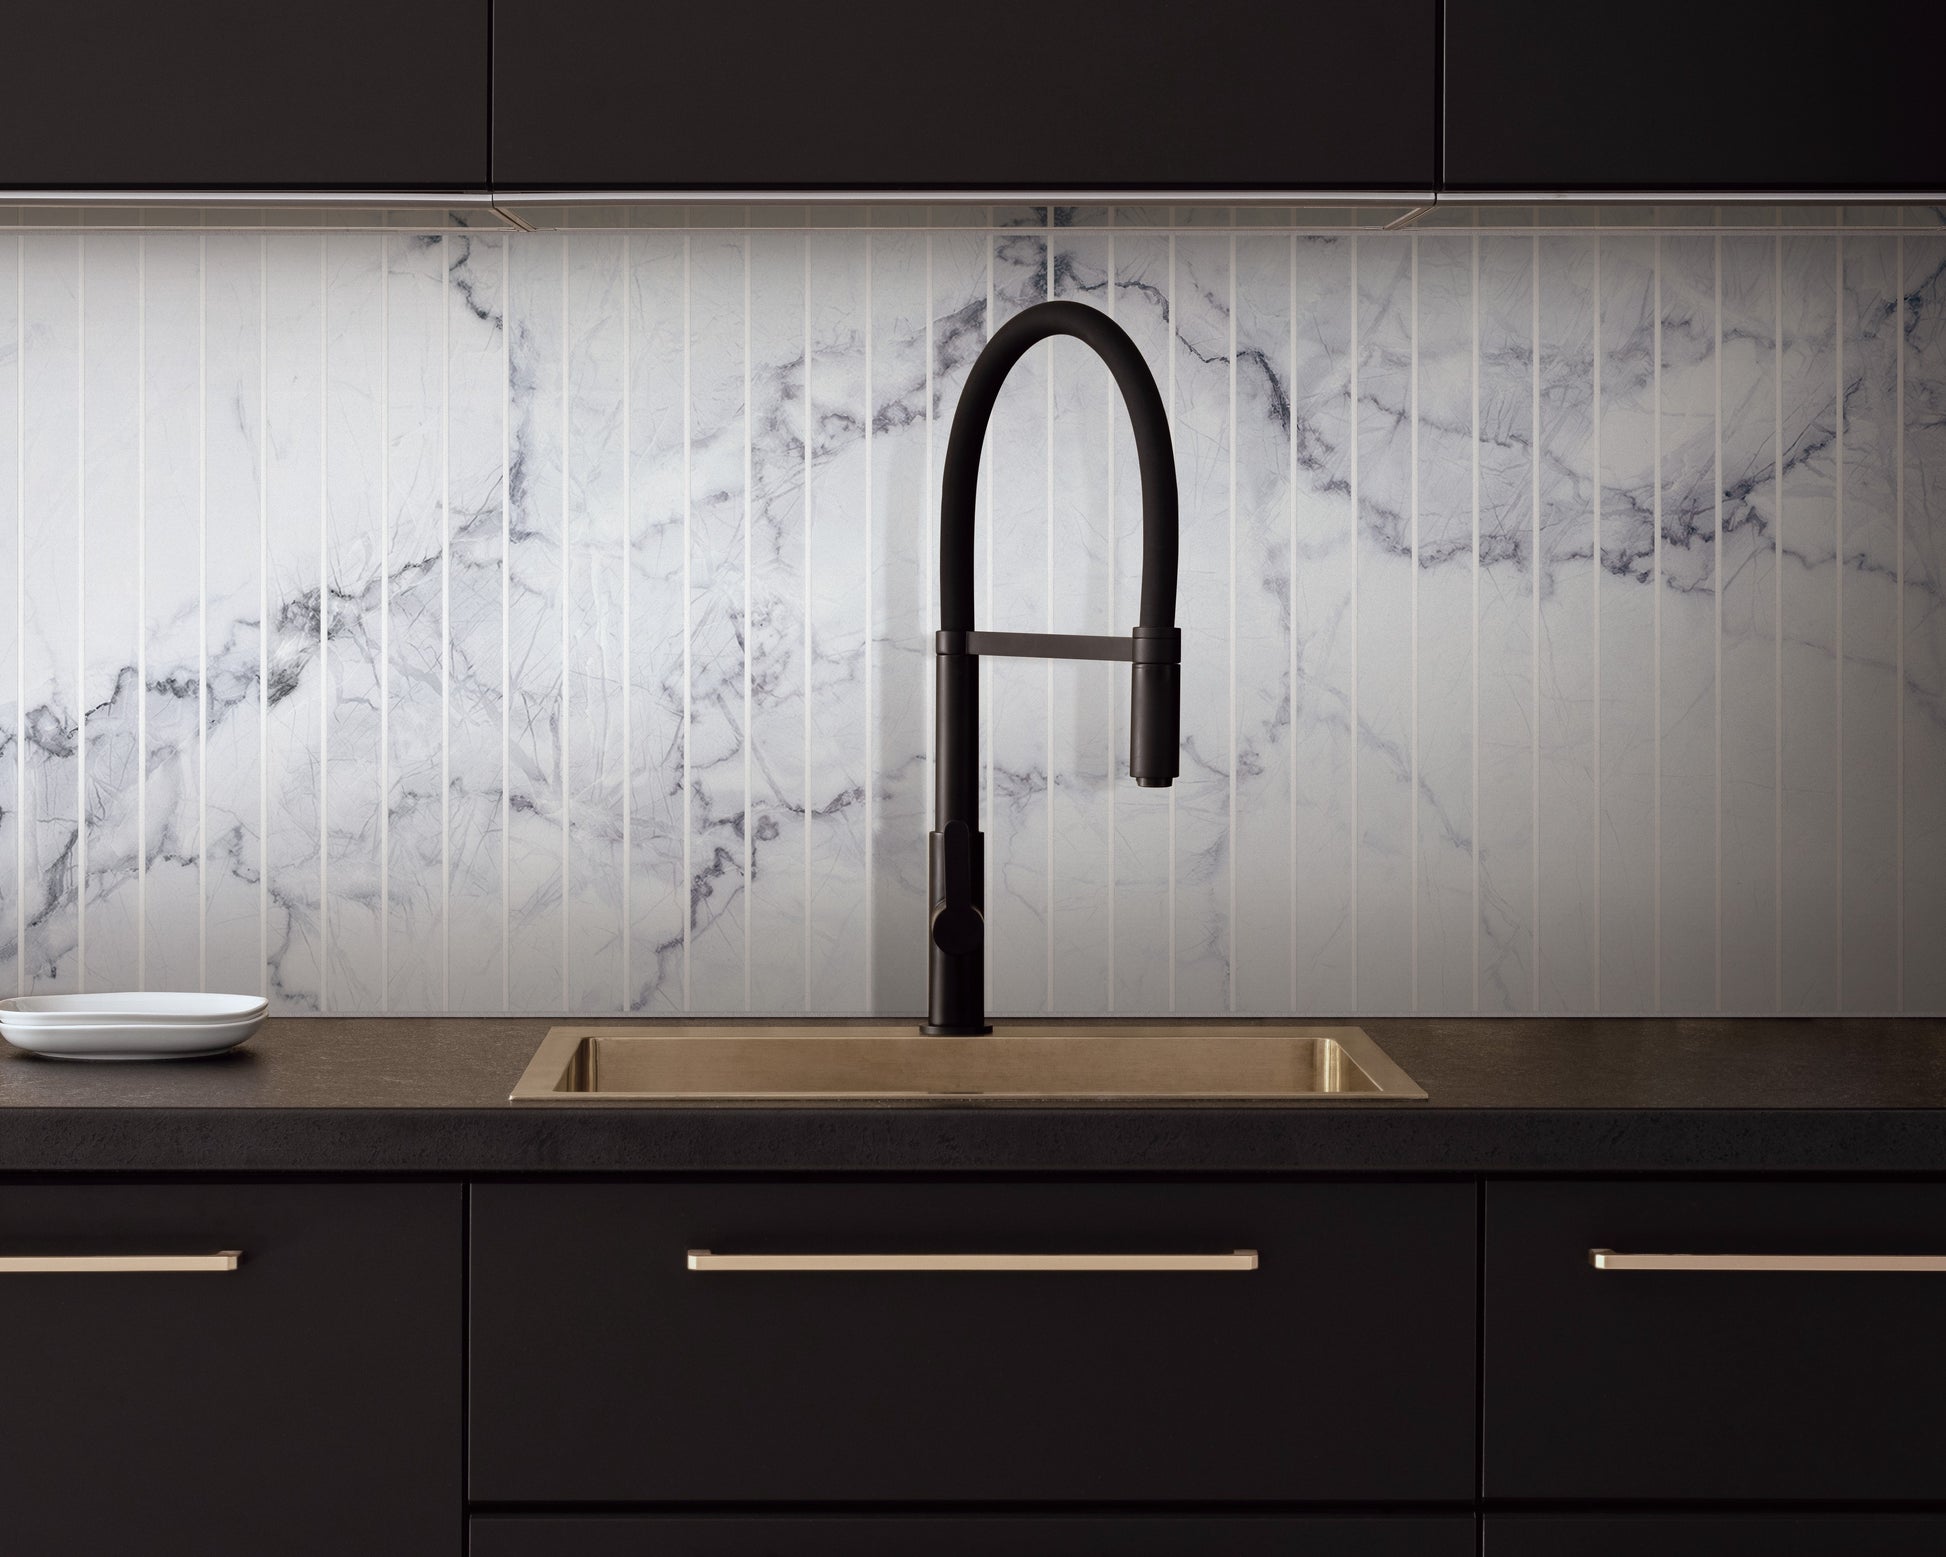
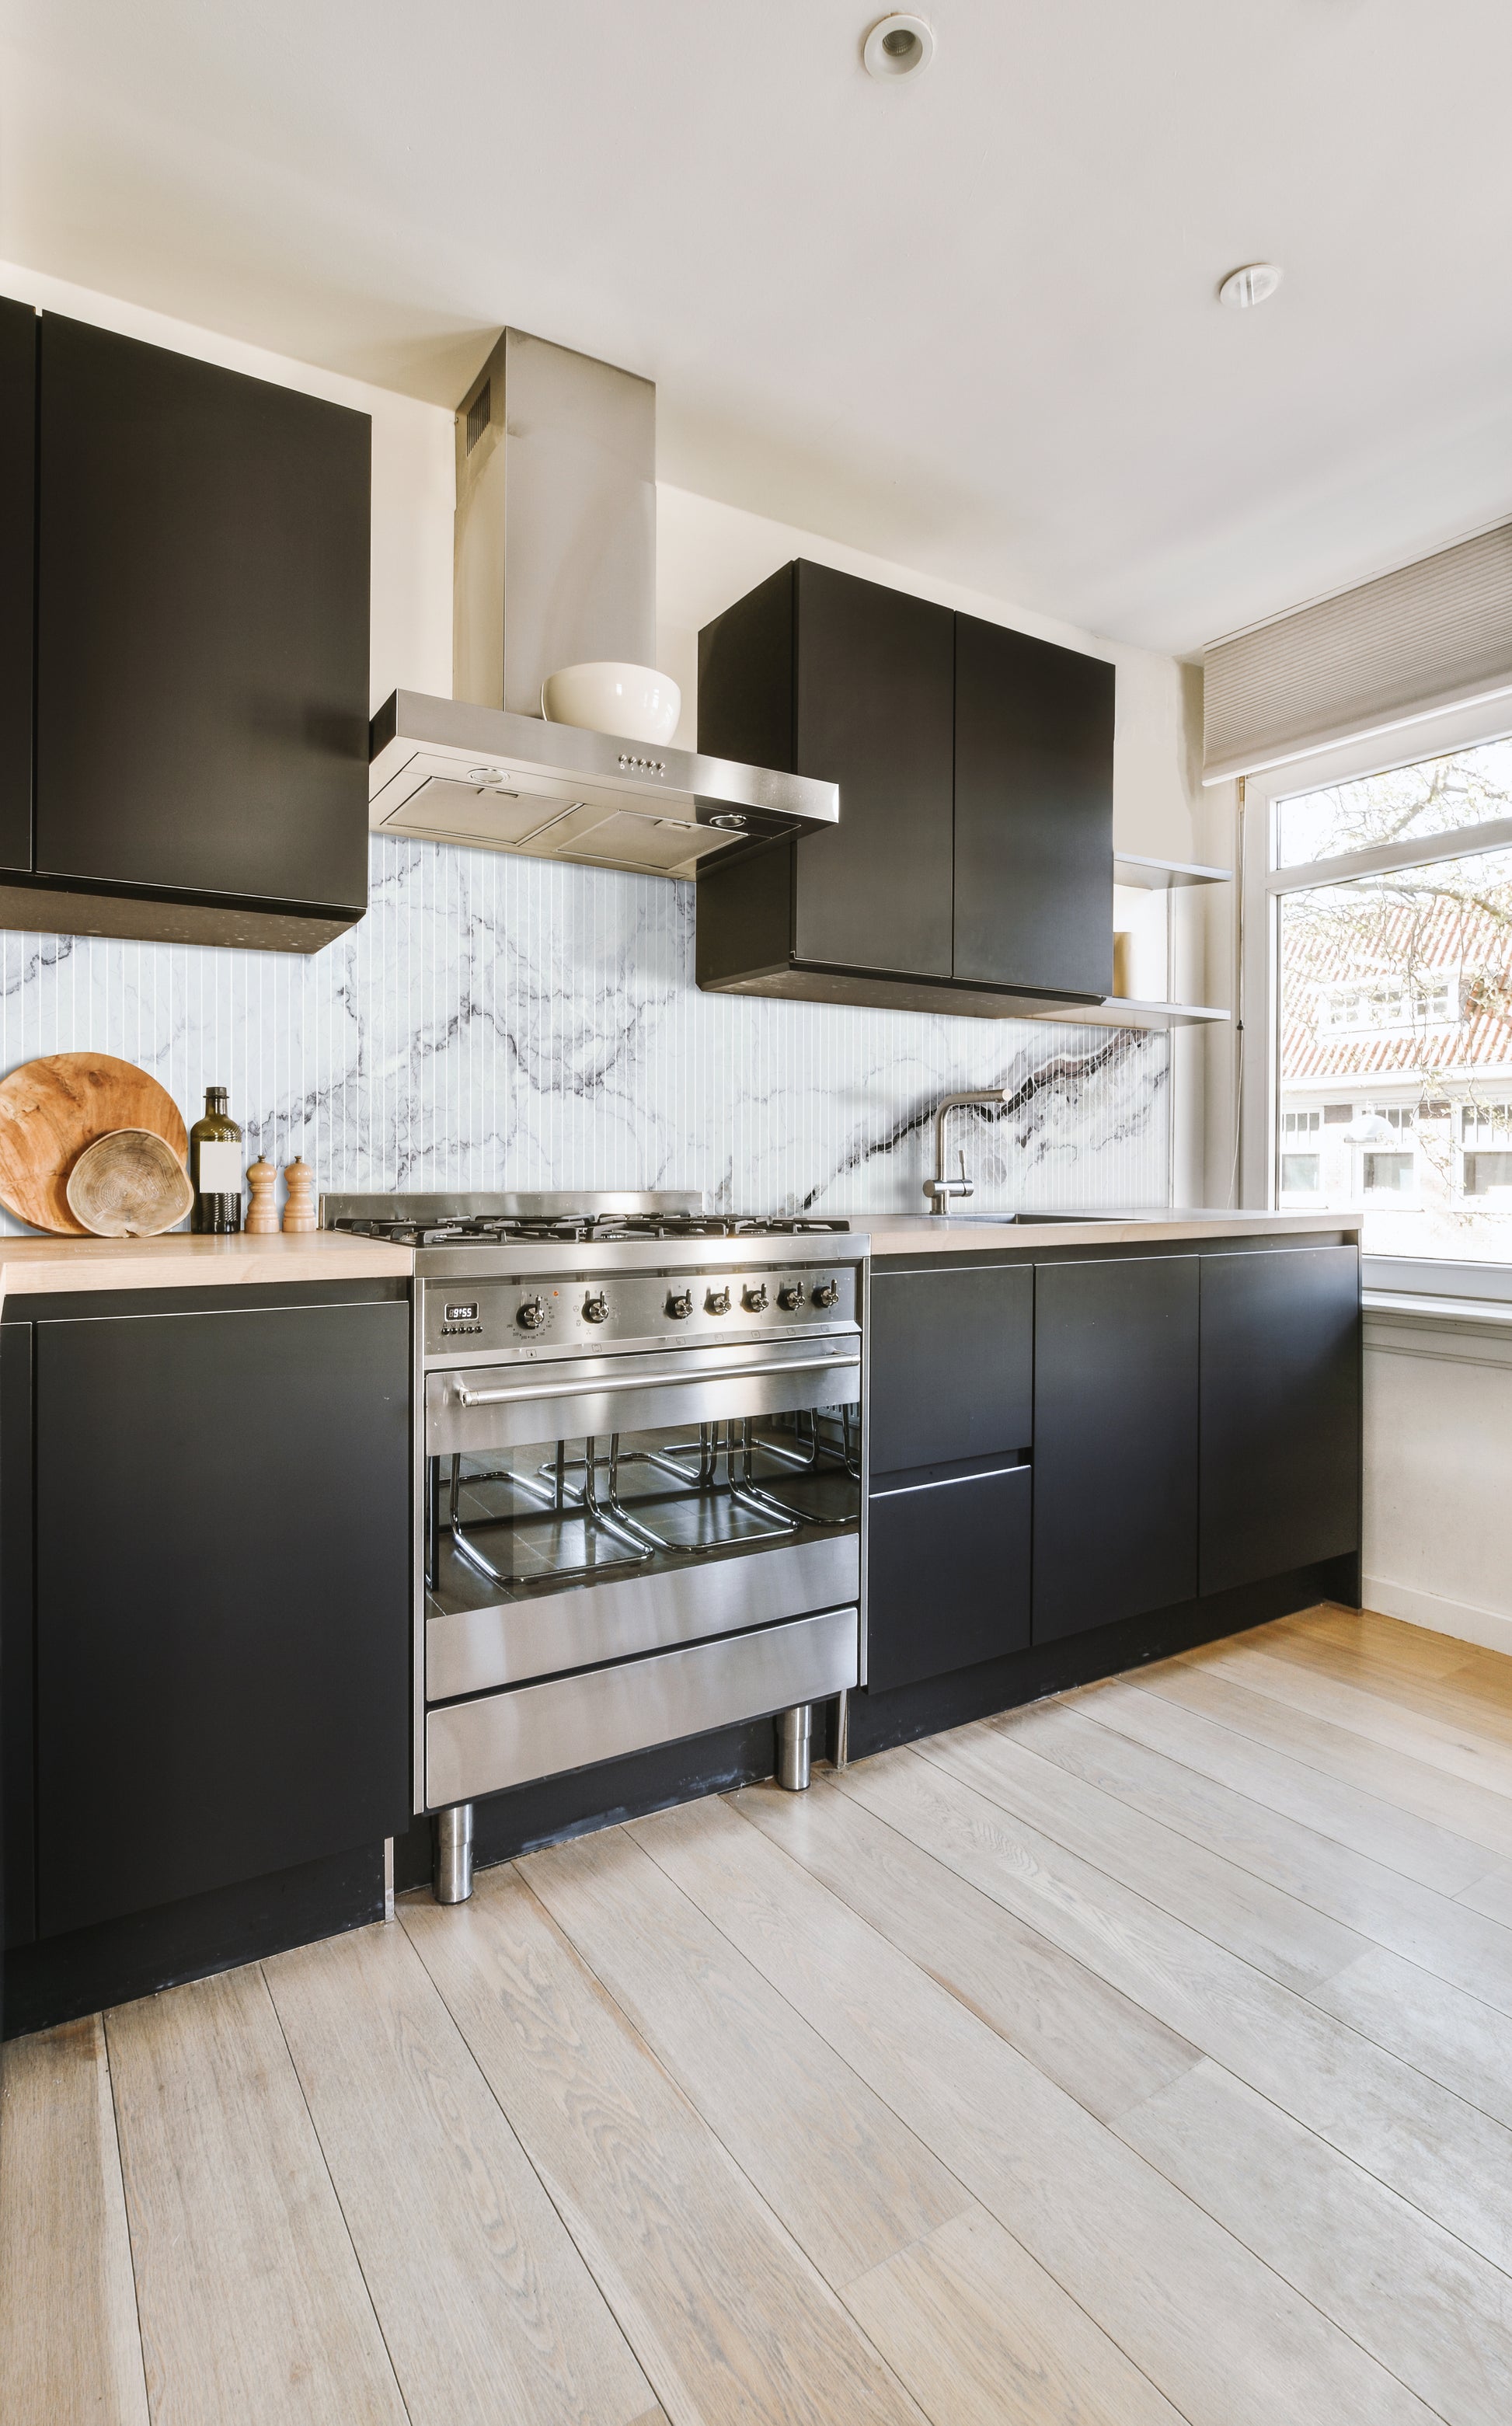
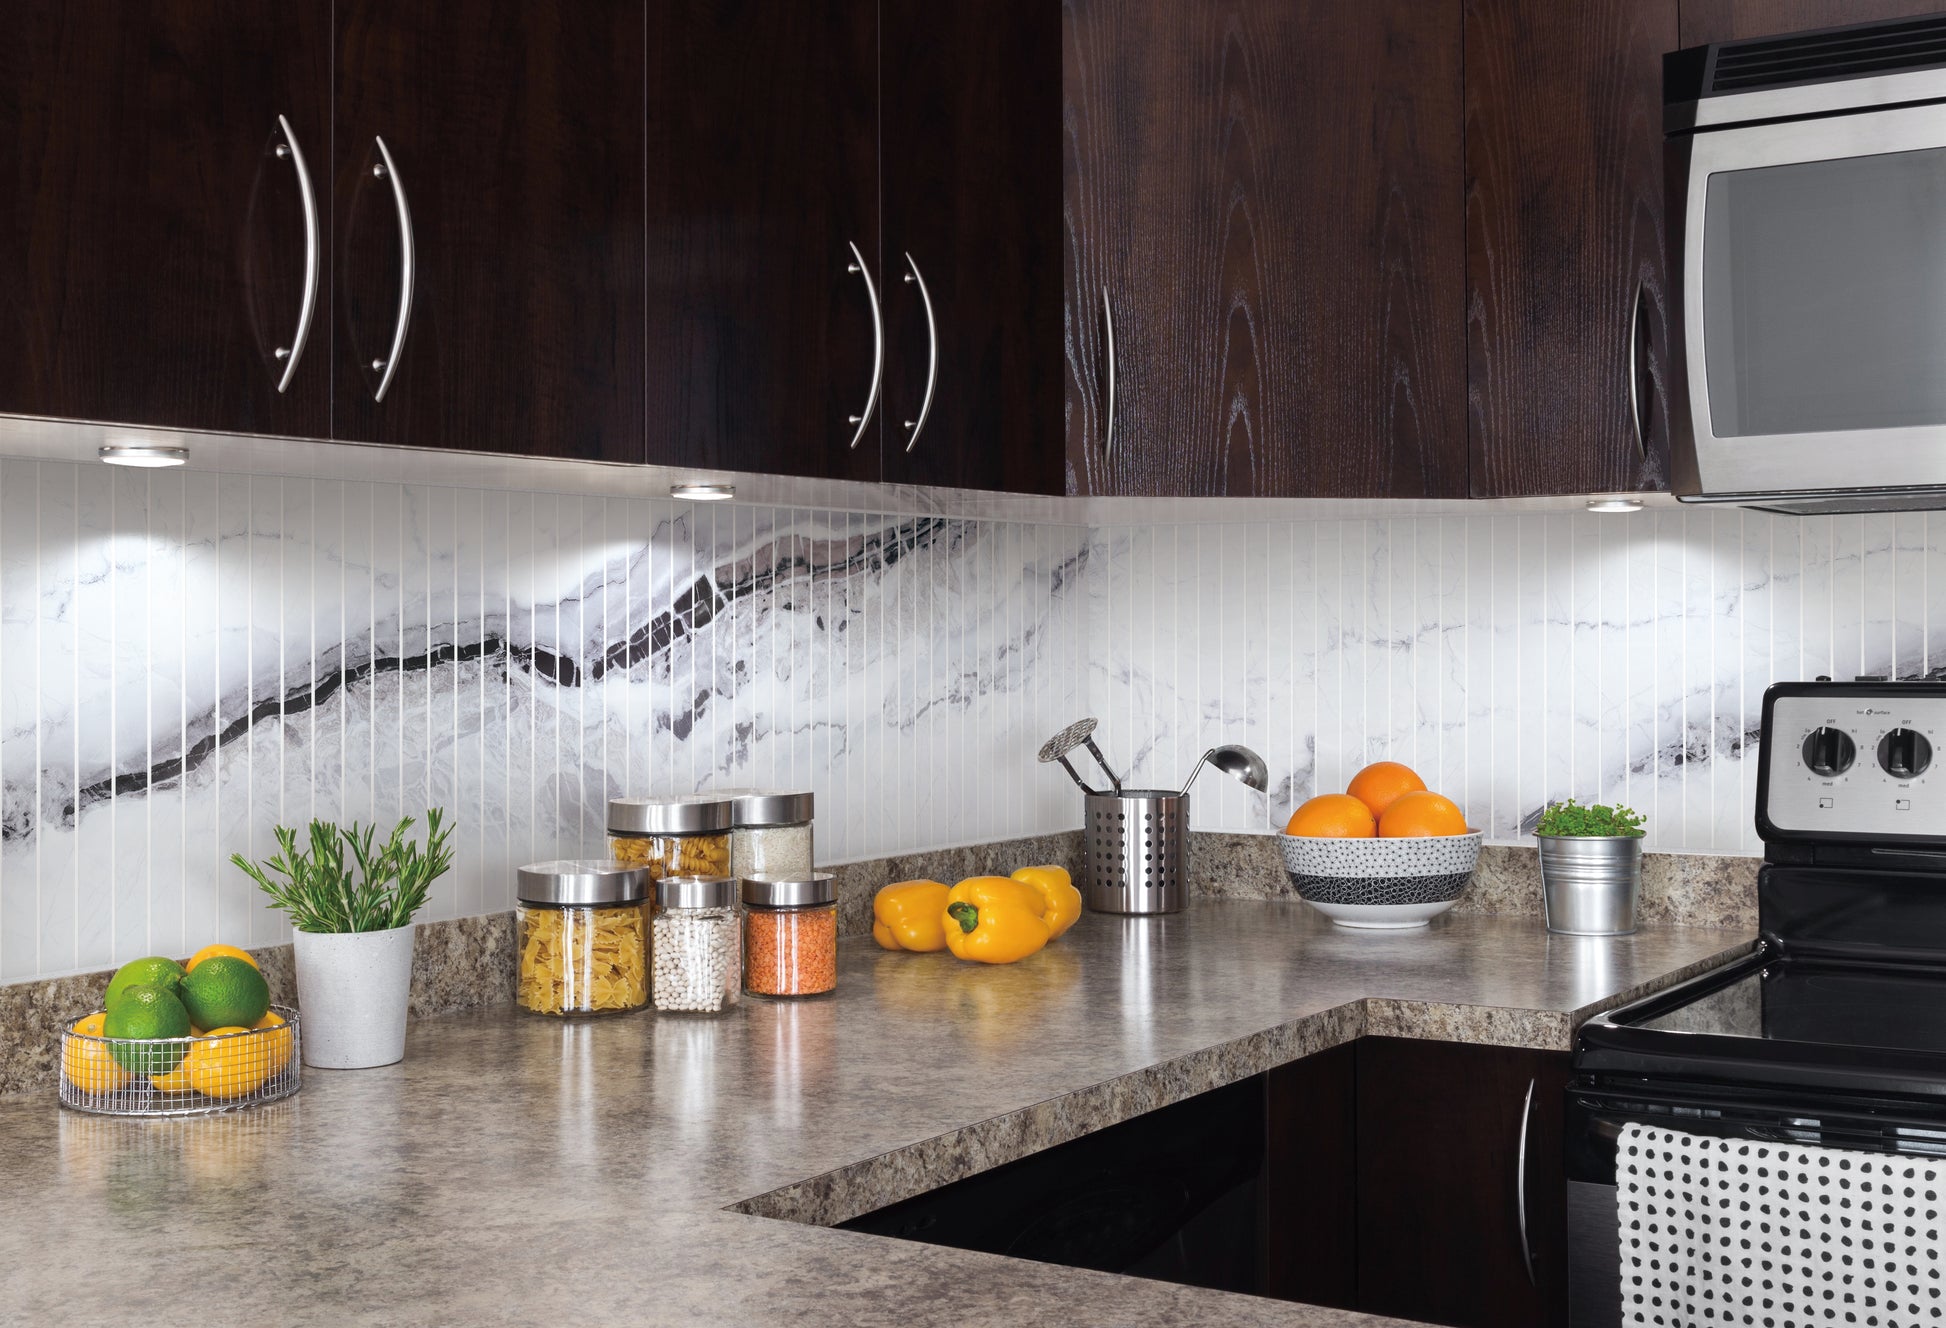
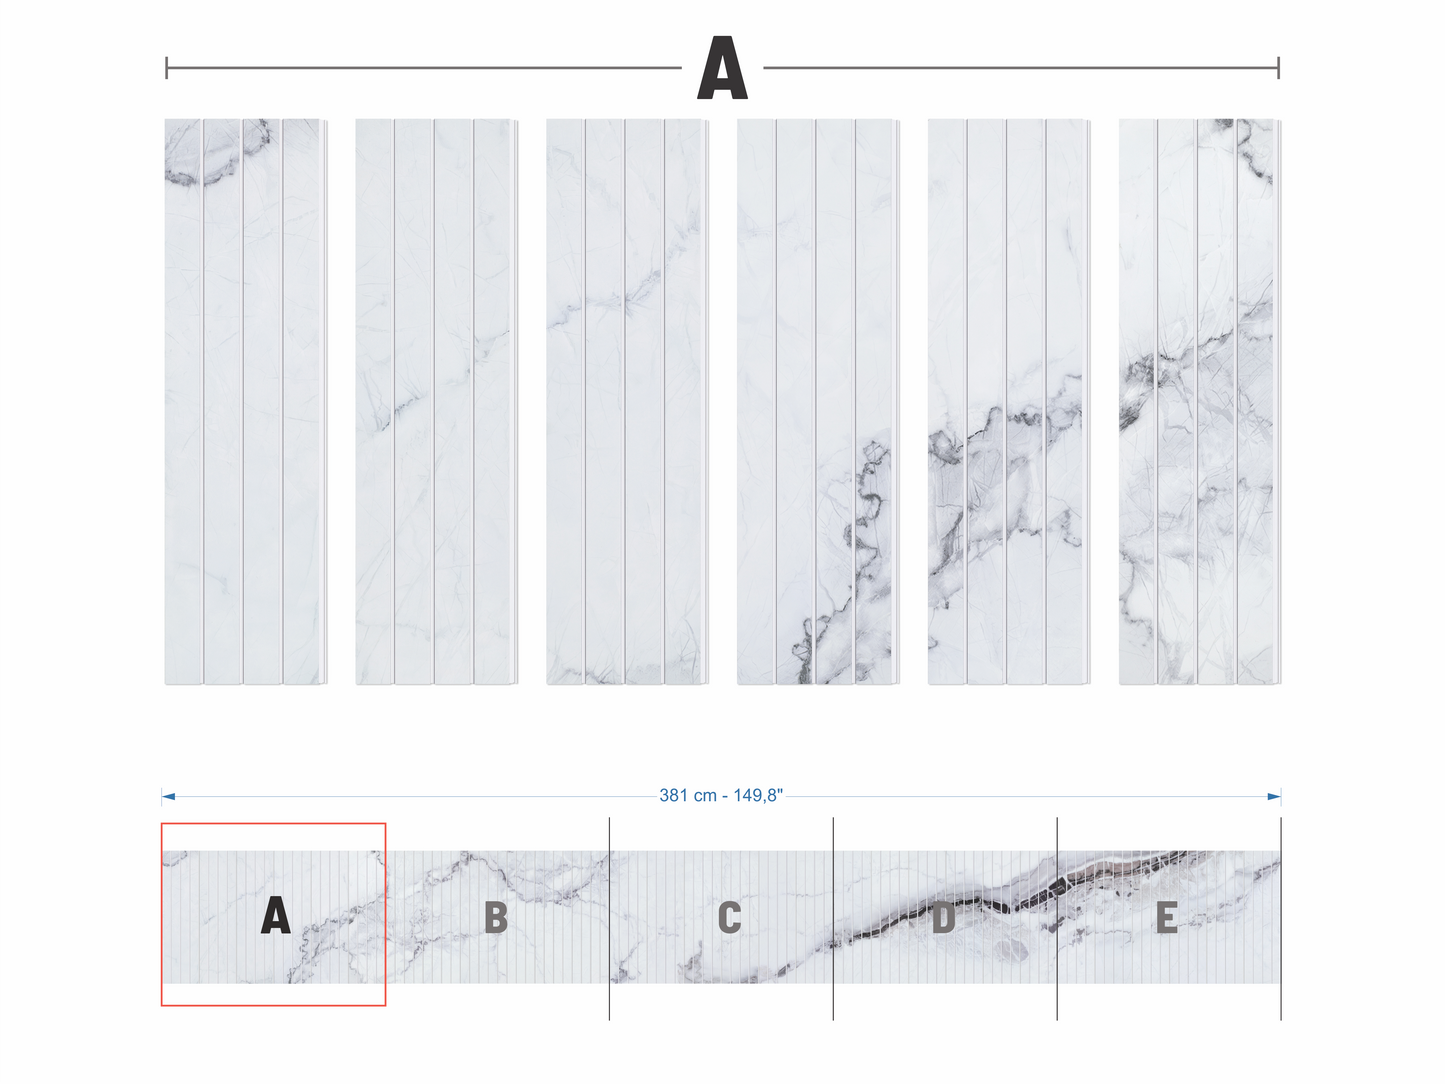
How the Verti•Go system works

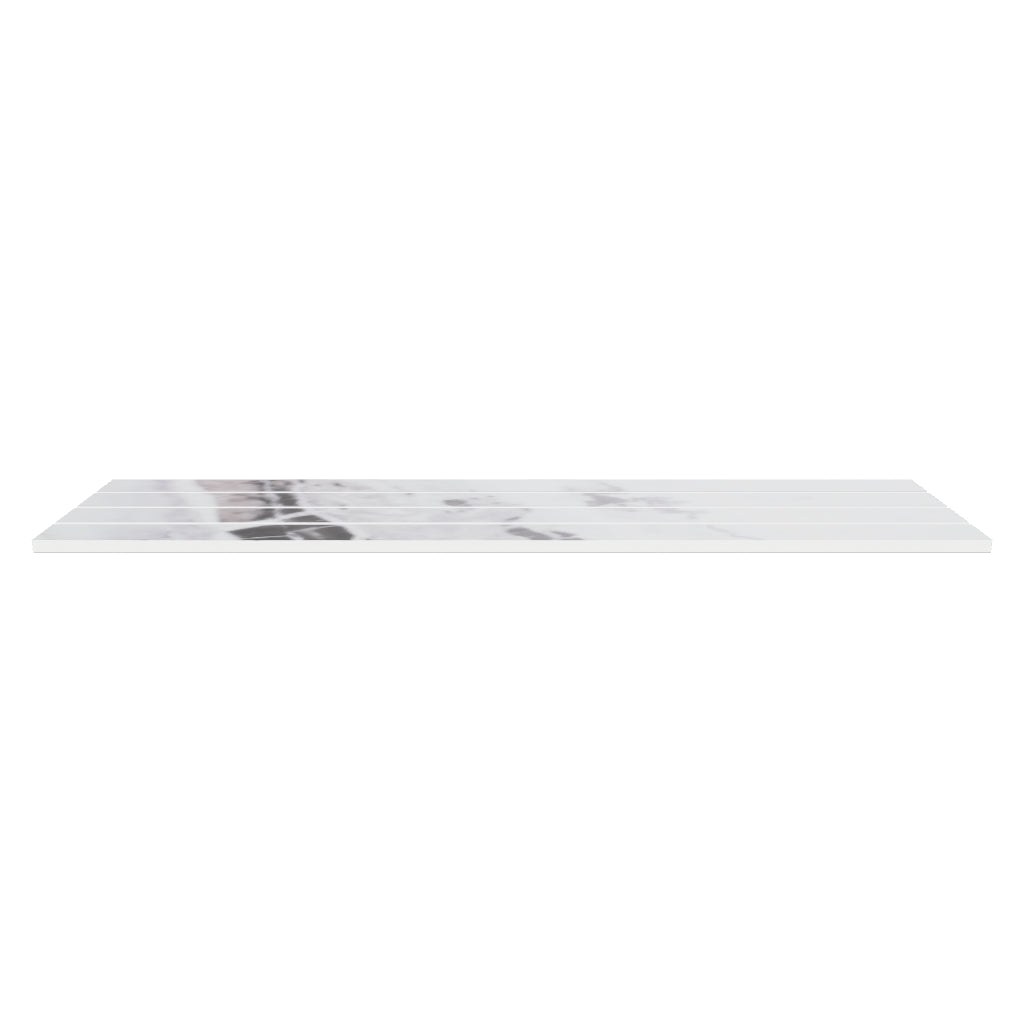
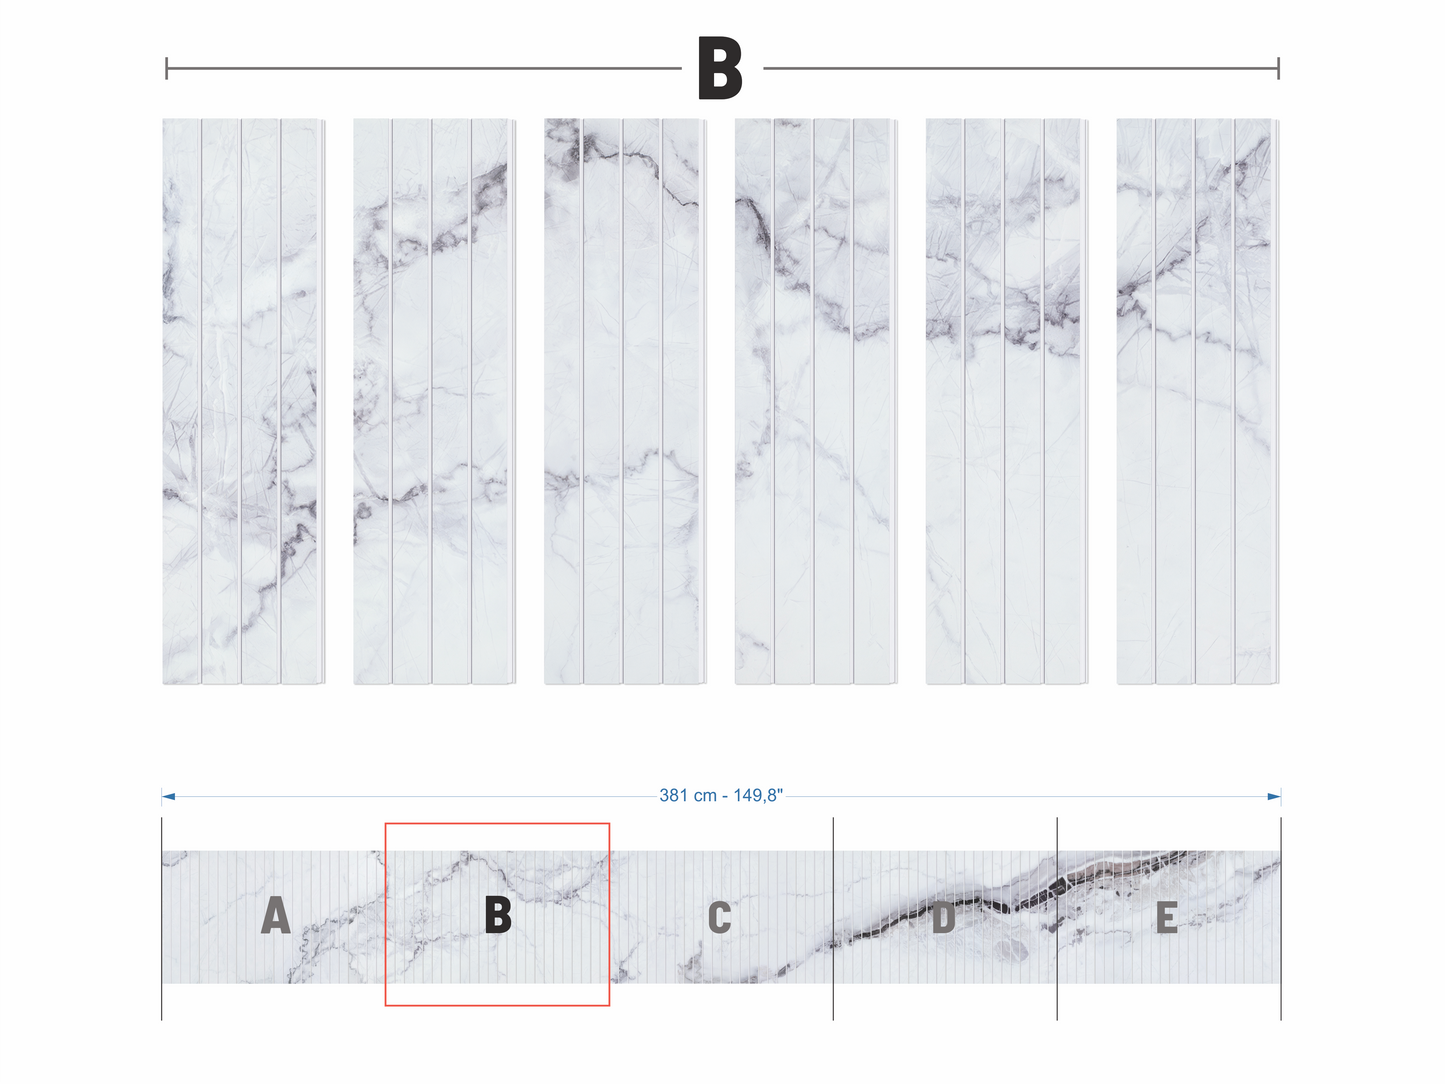
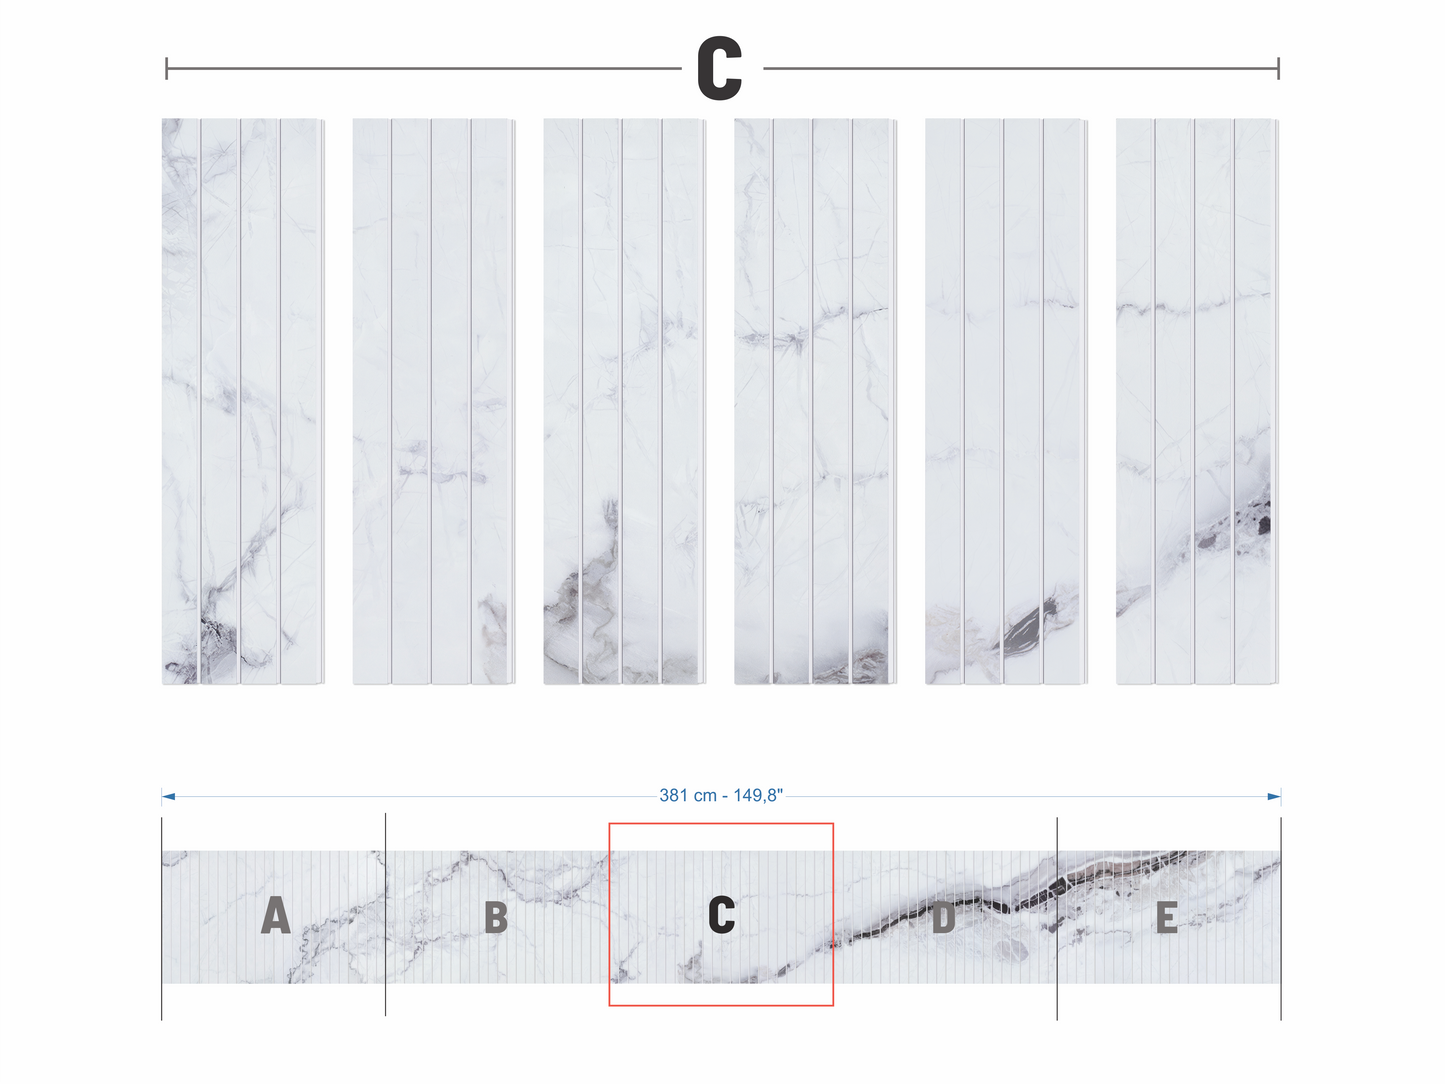
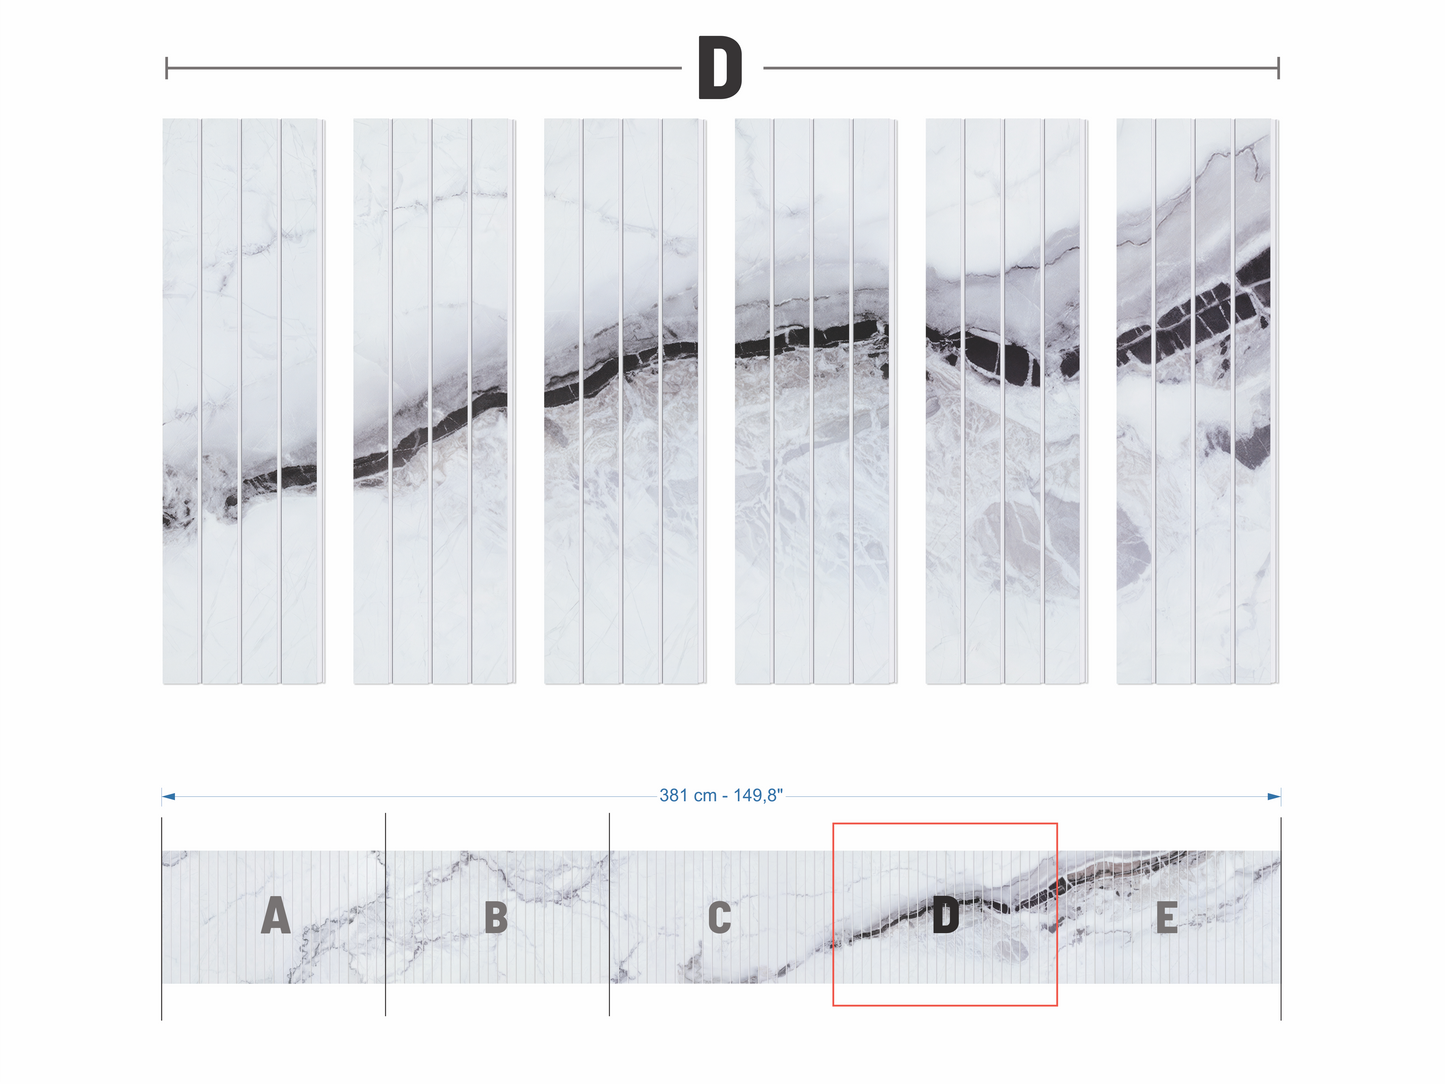
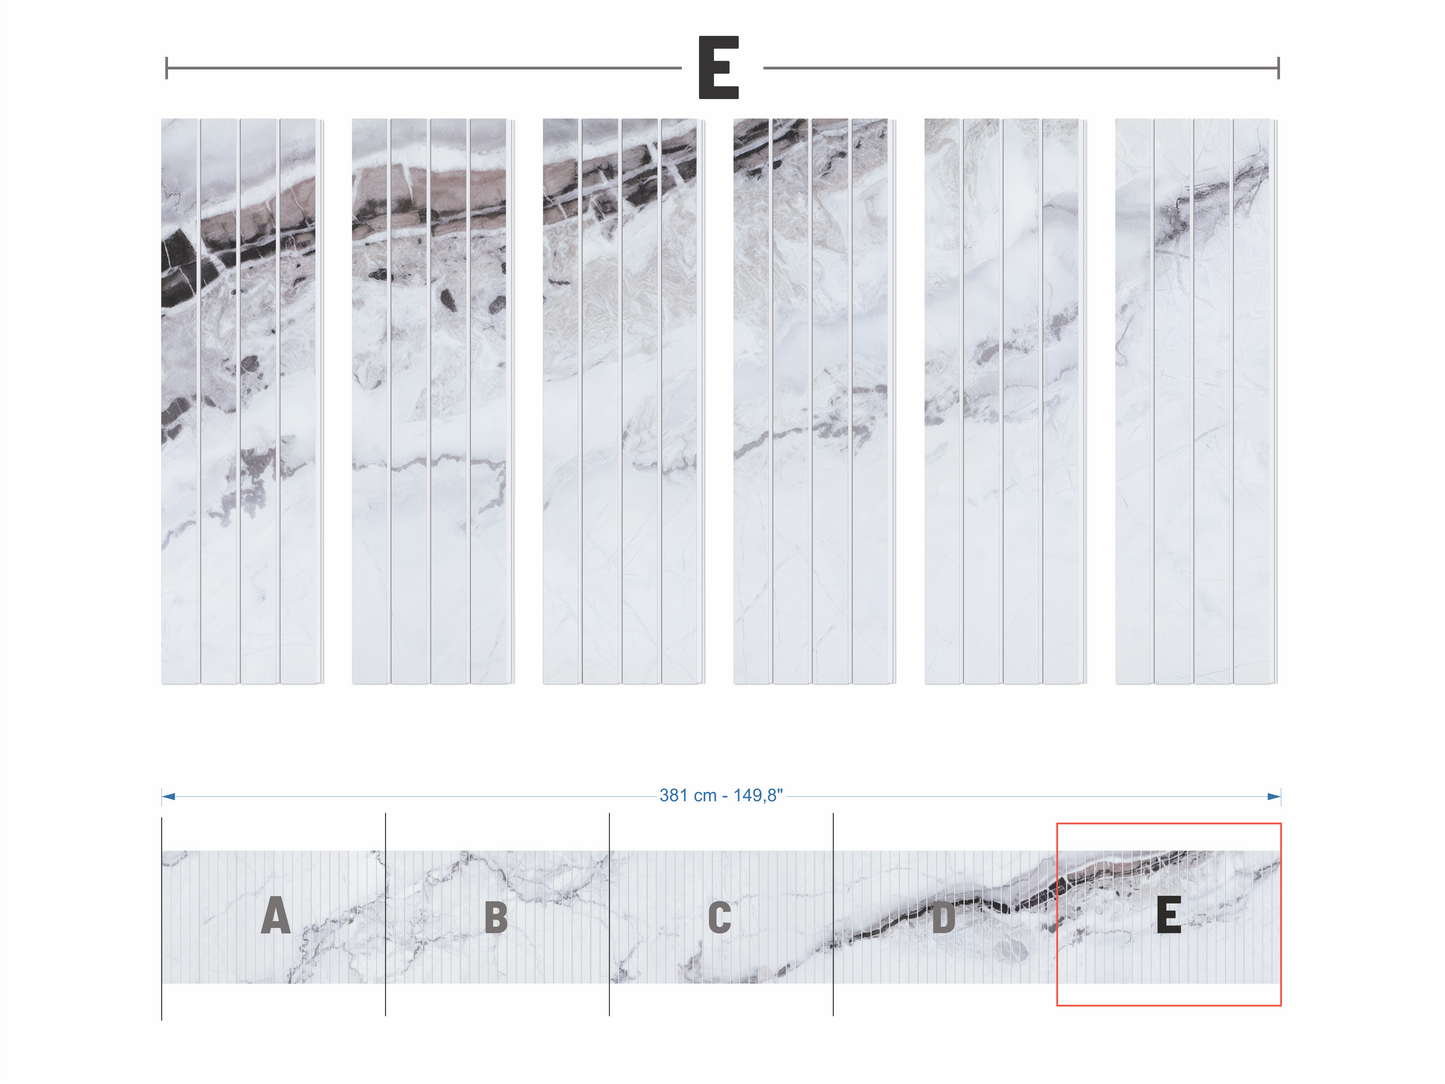
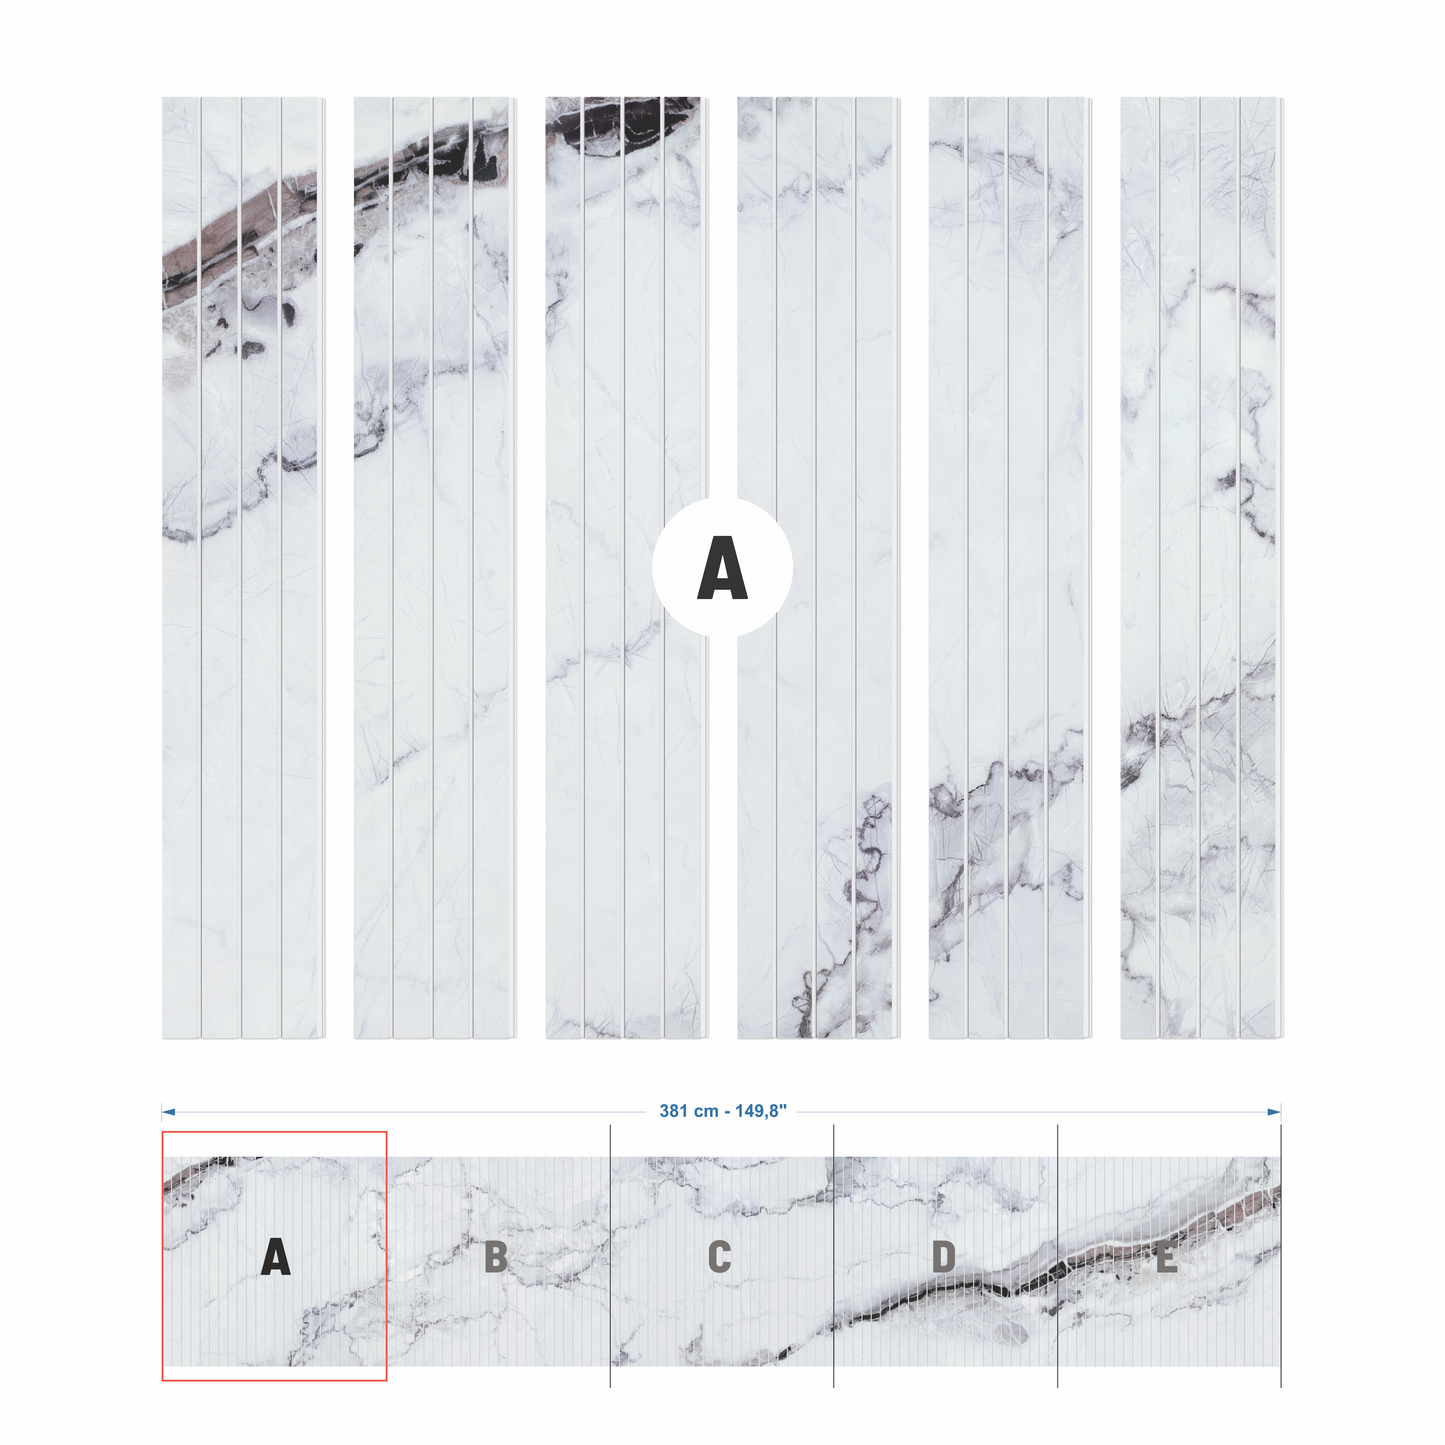
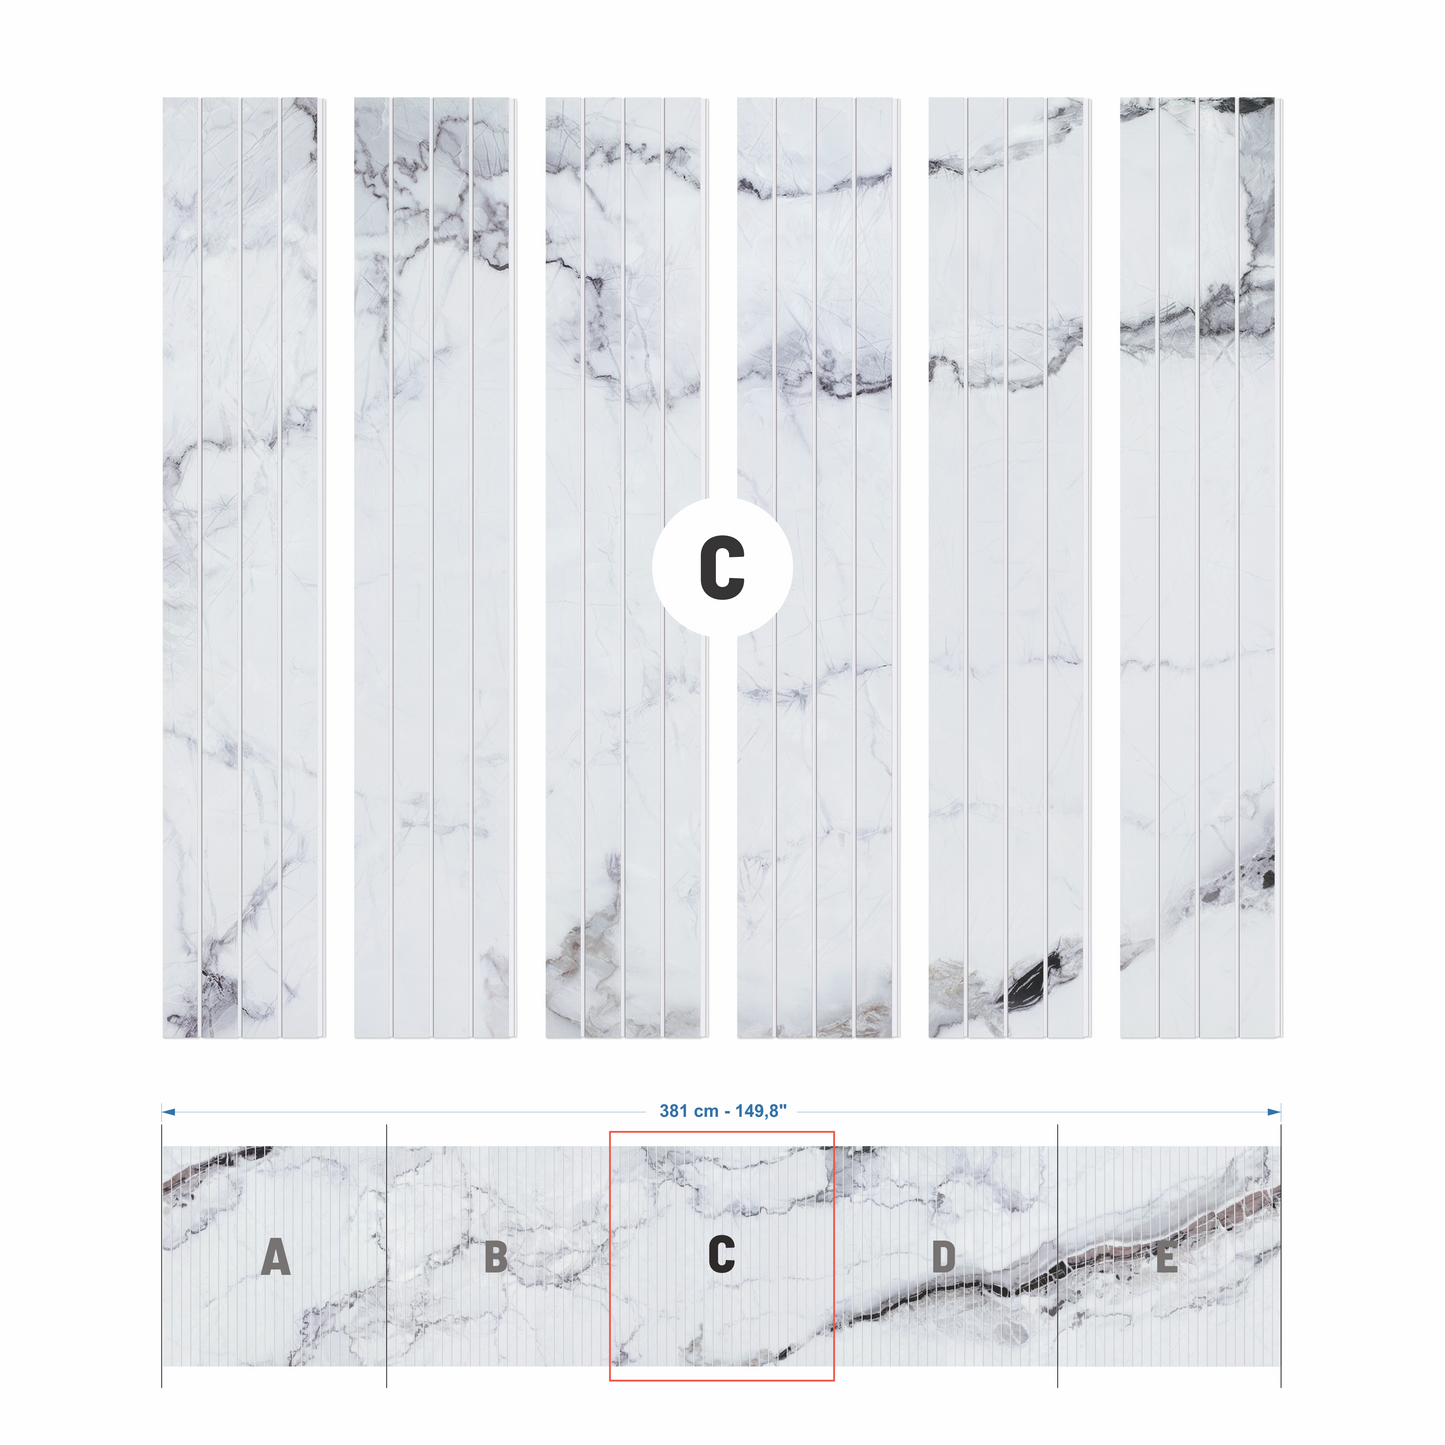
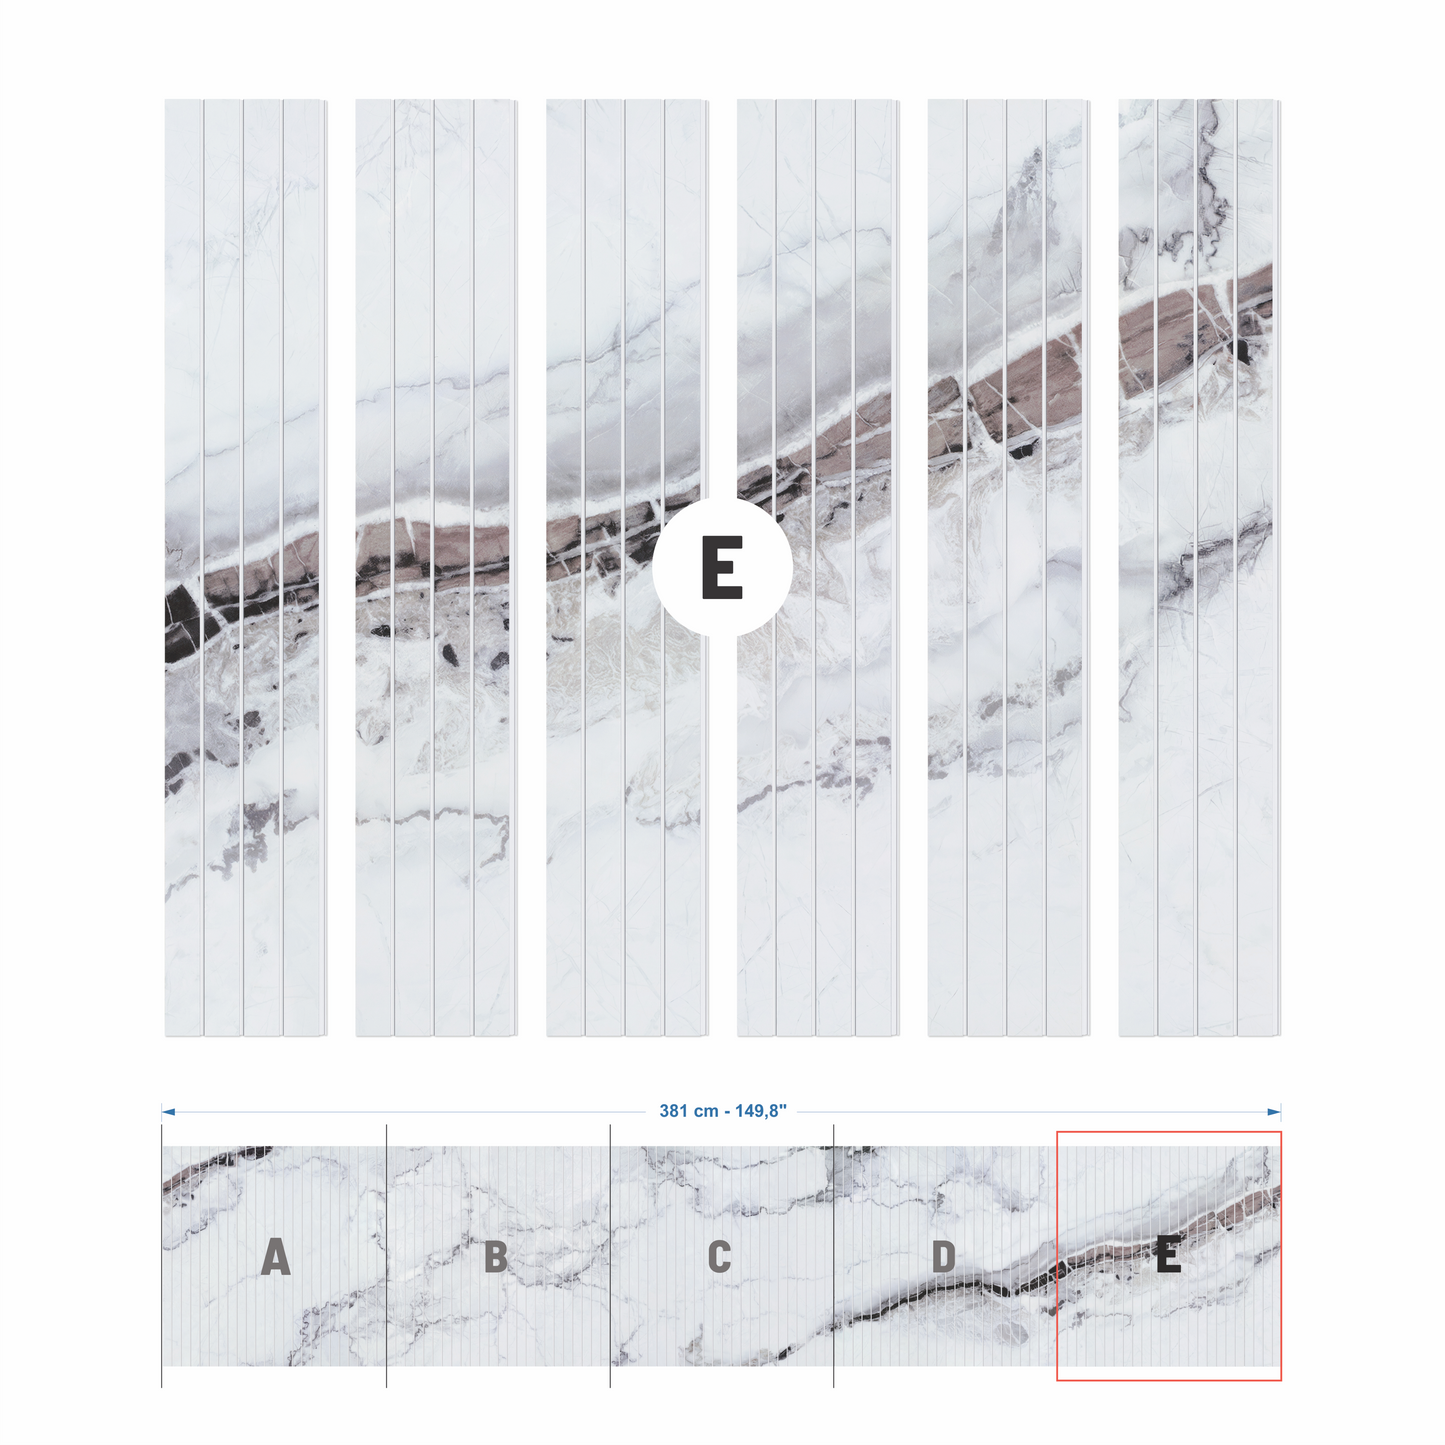
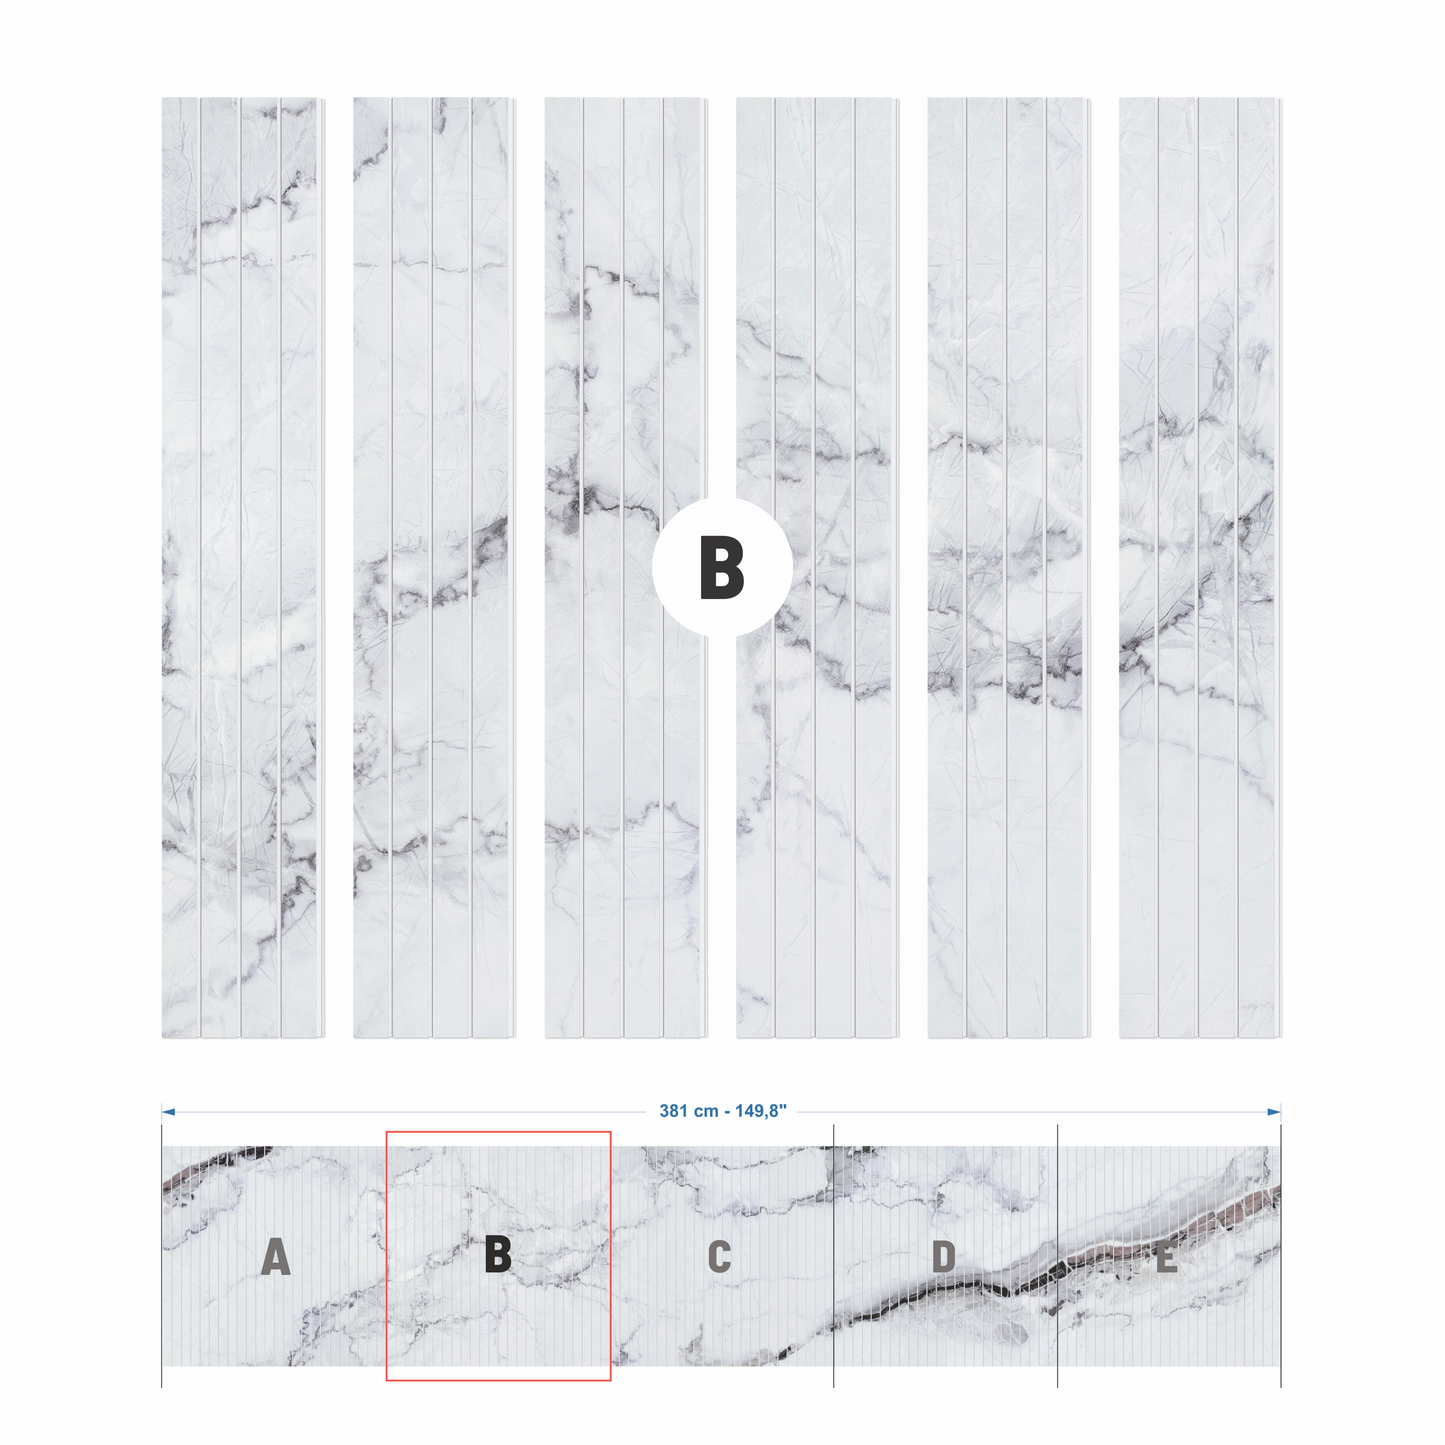
  • Comes in 5 distinct sections labeled A to E.
  • Each section is 30-in wide.
  • Sections must be installed in sequence to maintain continuous veining.
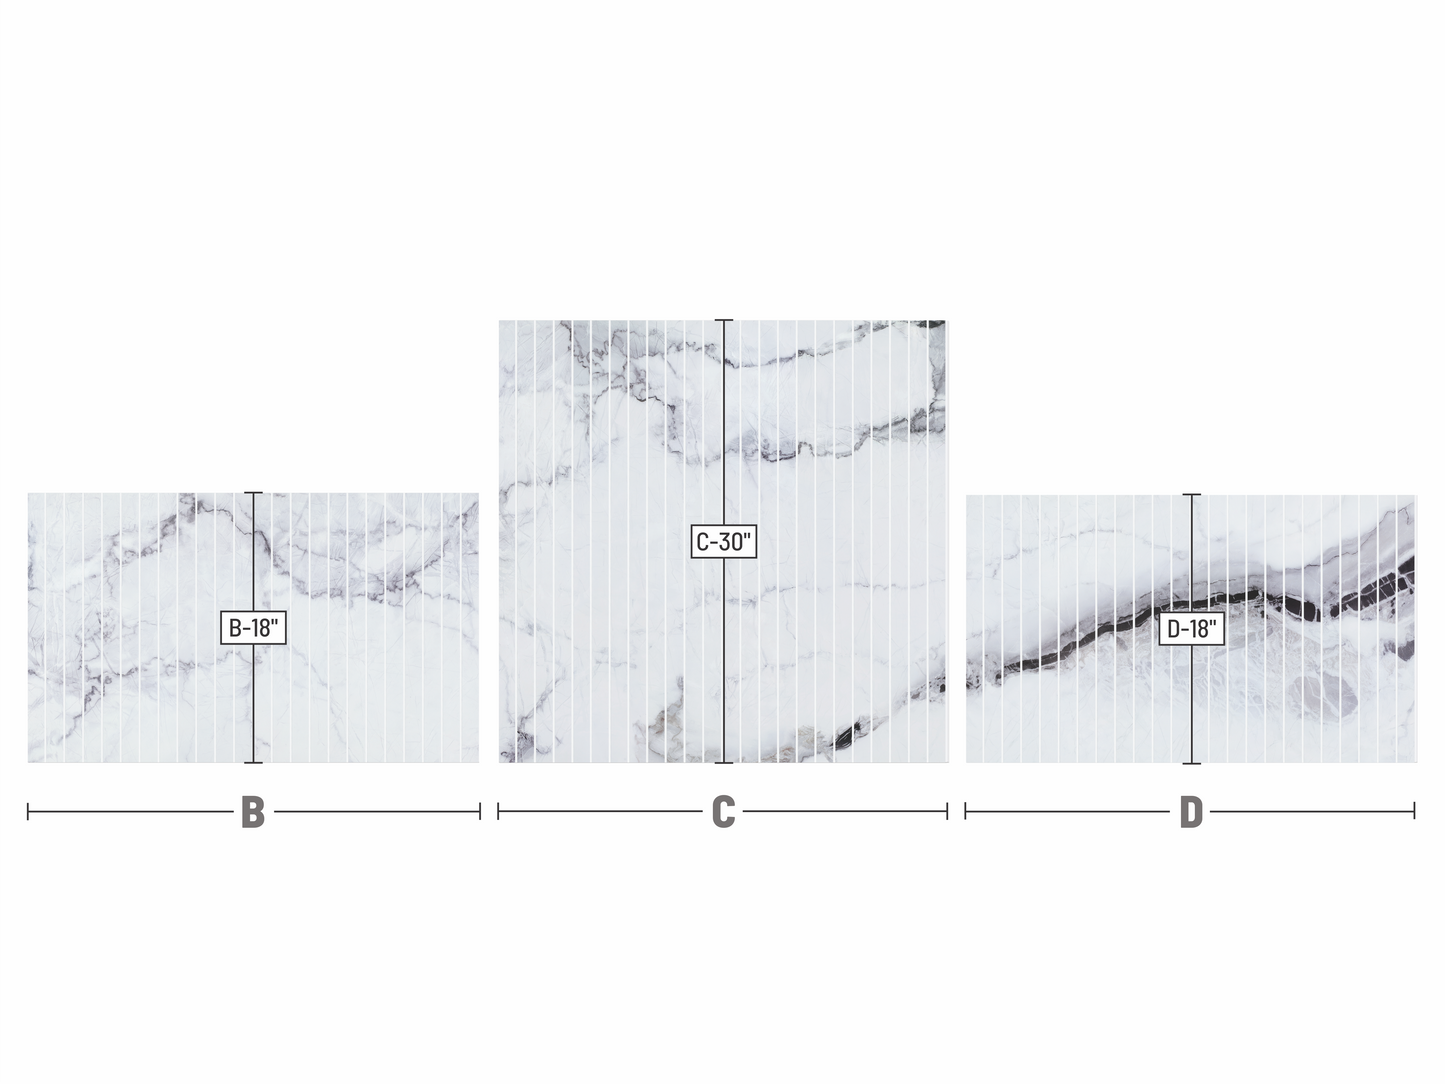
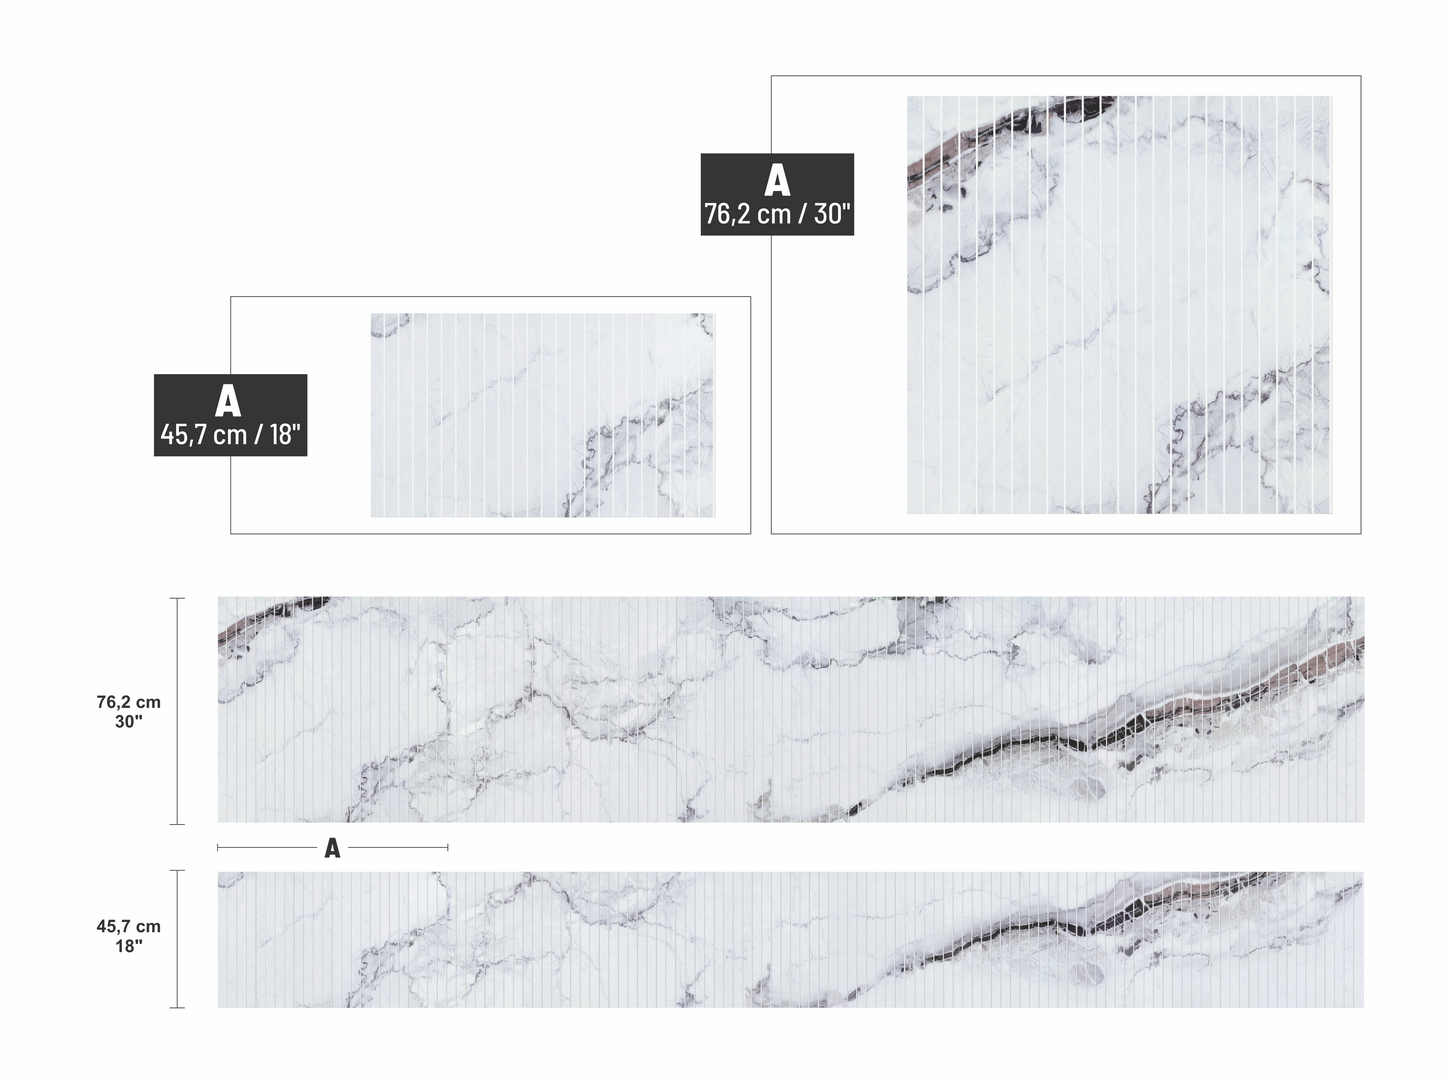
Choose your height

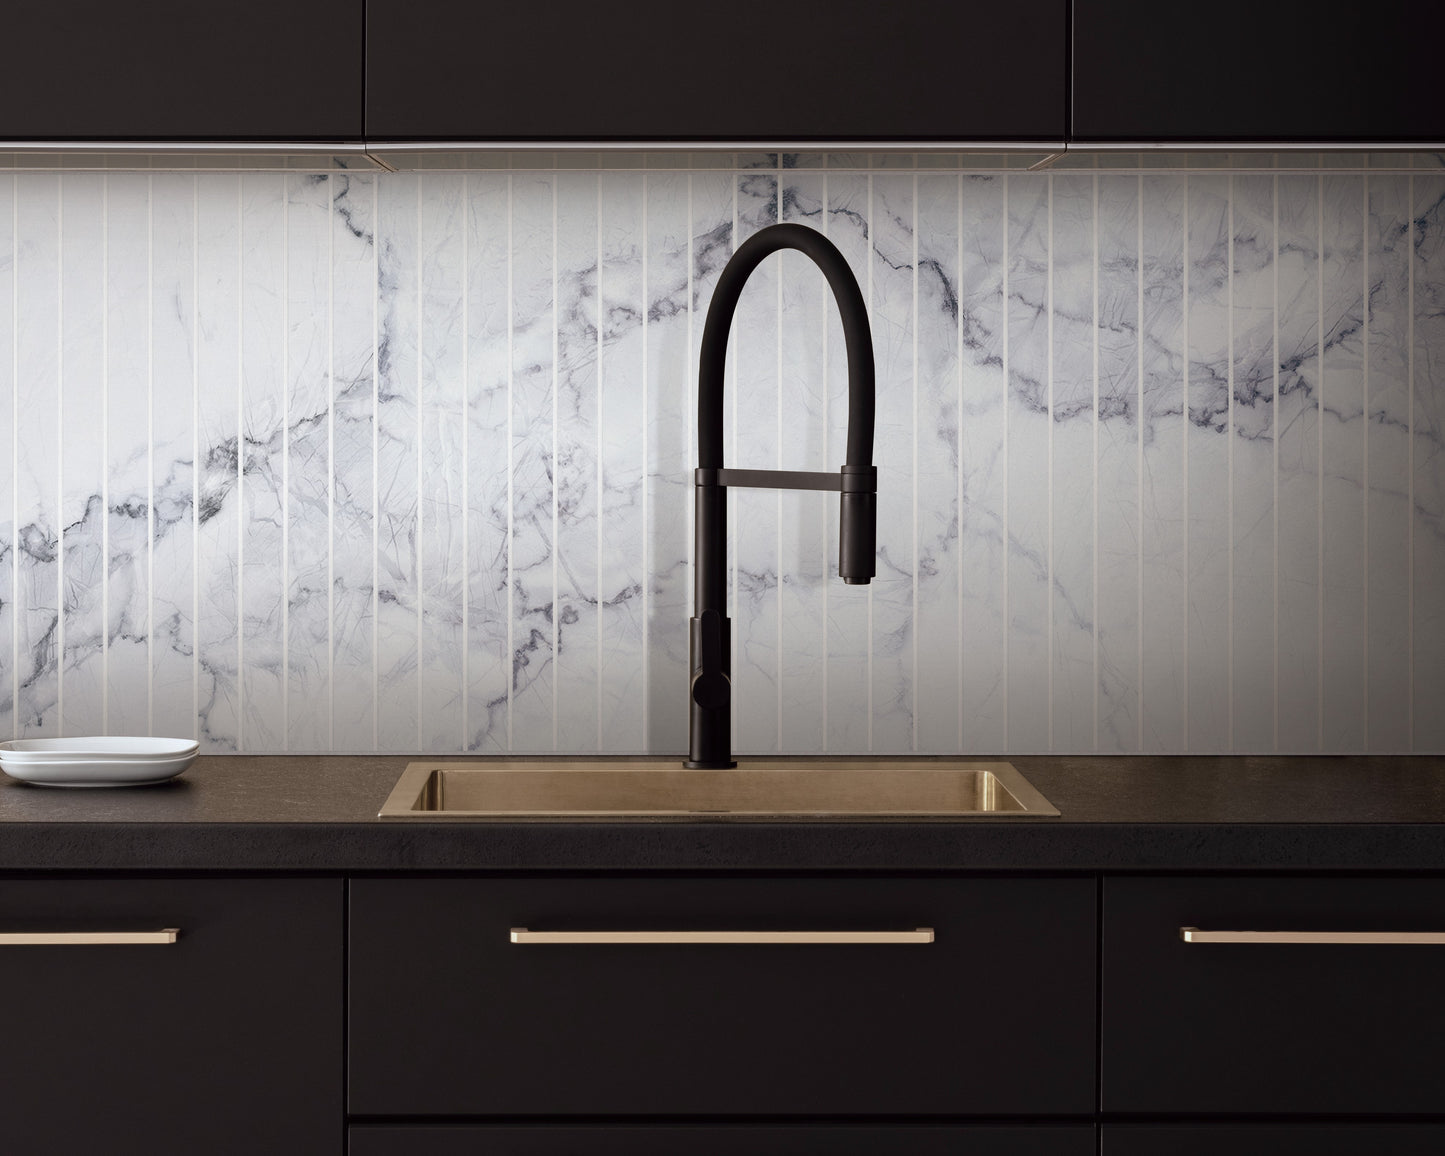
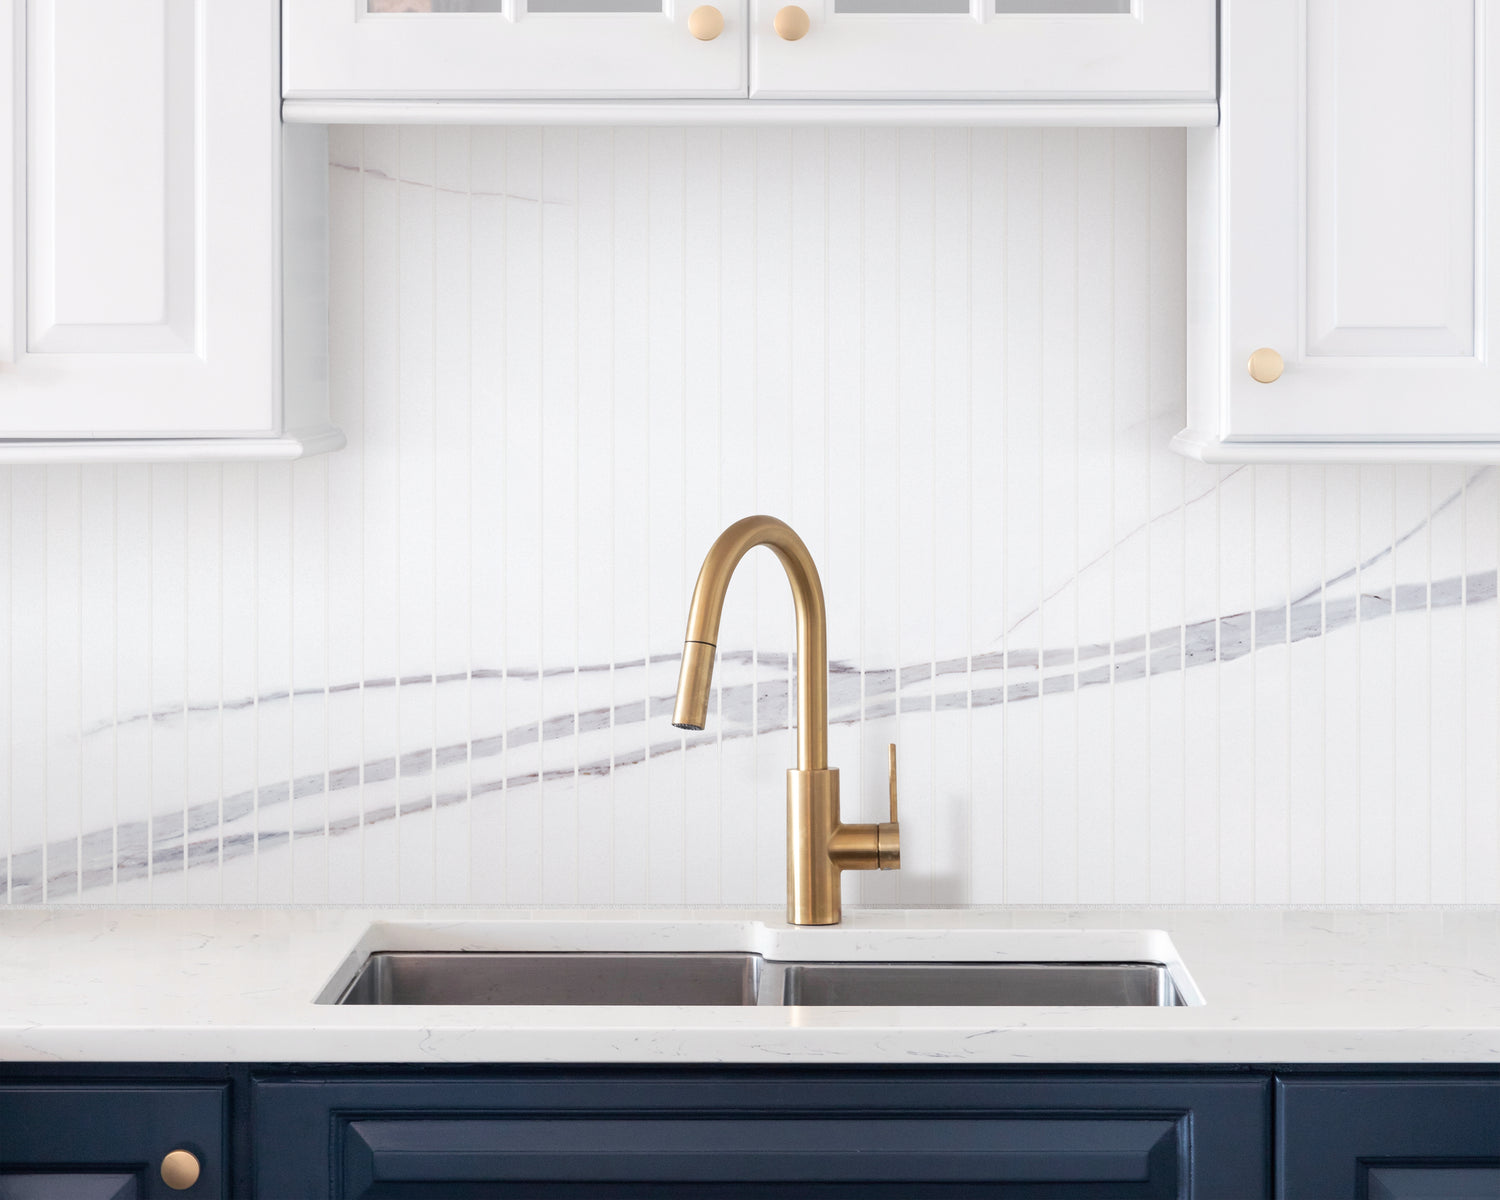
  • The 18-inch height is typically used between countertops and upper cabinets.
  • The 30-inch height is commonly used behind a stove or range hood.

Mixing heights in the same space

Both heights can be combined within the same space.

Choose your starting section

You may start with any letter from A to E, depending on the look you prefer.
Once the starting section is chosen, the sequence must continue in order to maintain the marble flow.

A can follow E.

Joint options

Go.Go.Grout

Go.Go.Grout is a pre-molded silicone grout designed specifically for Verti•Go joints.
It installs cleanly, requires no mixing or cleanup, and delivers consistent results quickly.
This option is ideal if you want the simplest and most stress-free installation possible.

Traditional grout

Traditional grout can be used if you prefer a custom grout color or a more traditional finish.
Only unsanded grout should be used, and installation requires additional time and cleanup.
This option is better suited for experienced installers or specific design preferences.

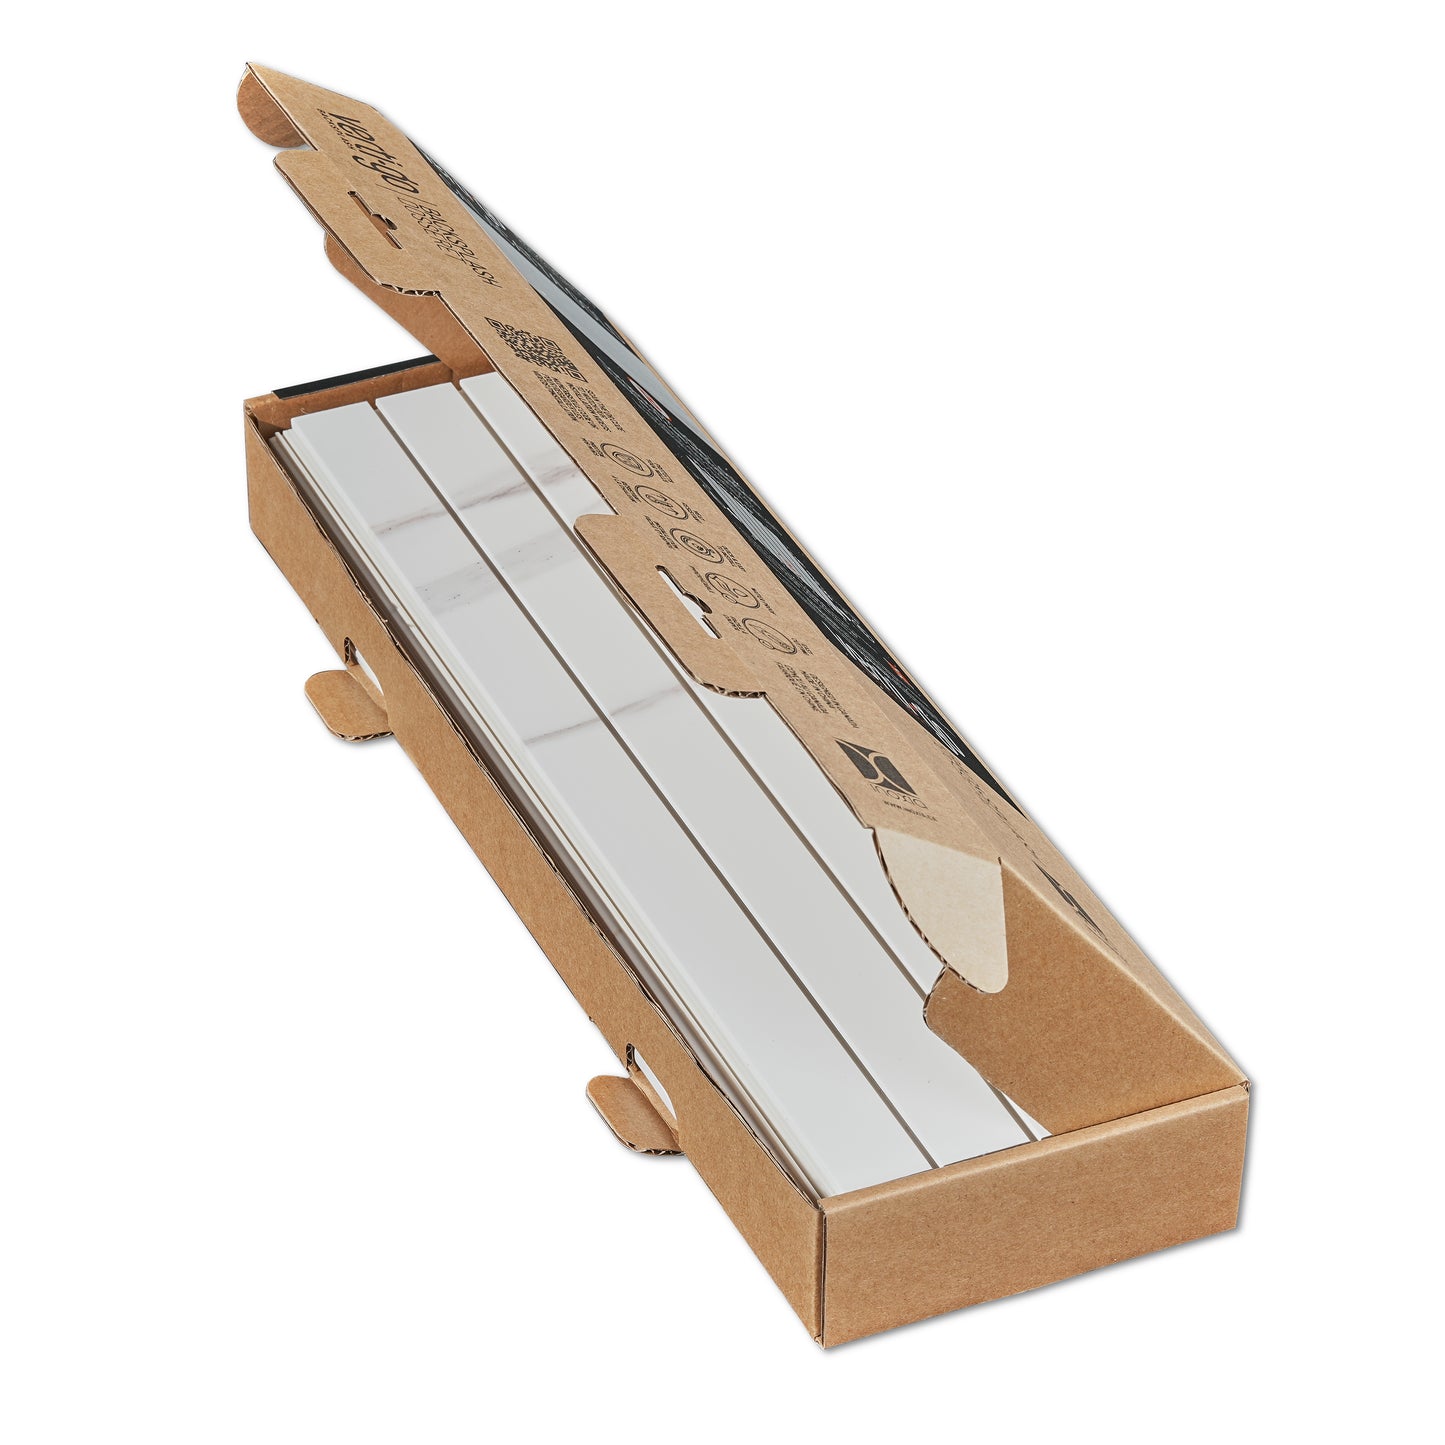
Installation Overview

Tools required

  • Measuring tape
  • Pencil
  • Cutting tool (utility knife or a hacksaw, a vinyl plank cutter, or any standard power saw)
  • Construction adhesive
  • Either Go.Go.Grout with its installation roller or traditional unsanded grout.

Basic installation steps

  1. Ensure the wall surface is clean, dry, and flat.
  2. Install the first section perfectly level, as it will guide the rest of the installation.
  3. Continue installing sections following the A–E sequence, cutting panels as needed.
  4. Once the panels are installed, finish the joints using Go.Go.Grout or traditional grout, depending on your preference.

FAQs

Verti.Go planks are made of a stone composite, with an hyper realistic marble finish.

The current sizes are designed for backsplash installation. A shower and full-wall version will be available soon.

The 18-in panels fits the space between countertop and upper cabinets. The 30-in ones are designed for the area behind the stove.

You select the right size for each section, with no wasted material.

Each section includes 6 panels and covers 30 inches of width. Simply measure the total width of your backsplash, then divide that number by 30 to find out how many sections you need.

Adding approximately 10% extra is recommended for cuts and adjustments.

Yes!

You can also connect section E to A seamlessly, allowing you to extend your backsplash to any width without any break in the design.

For daily maintenance of your Verti.Go backsplash, you can use any non-corrosive cleaner or a simple dish soap and water solution.

Installation

Yes!

VertiGo is a DIY product designed for easy installation, even if you have little or no prior experience.

Yes! You can use many tools to cut the Verti.Go panels.

Of course any electrical saw will work, but you can also use a utility knife, a hacksaw and a vinyl plank cutter.

You can watch a video here.

Yes!

You can use a utility knife, a rotary tool, an oscillating tool, etc.

Doing a clean corner is easy with Verti.Go!

Please watch the video here.